
Many of us rely on our air fryers daily to whip up quick meals, heat leftovers, and feed the family. However, with heavy use comes the inevitable buildup of grease, crumbs, and lingering food odors.
While you don’t necessarily have to scrub it down after every single use, regular cleaning is essential. Leftover food and grease can obstruct airflow, leading to uneven cooking times, foul tastes, and even potential fire hazards. Keep your appliance spotless and performing at its best with this expert-backed, step-by-step cleaning guide.
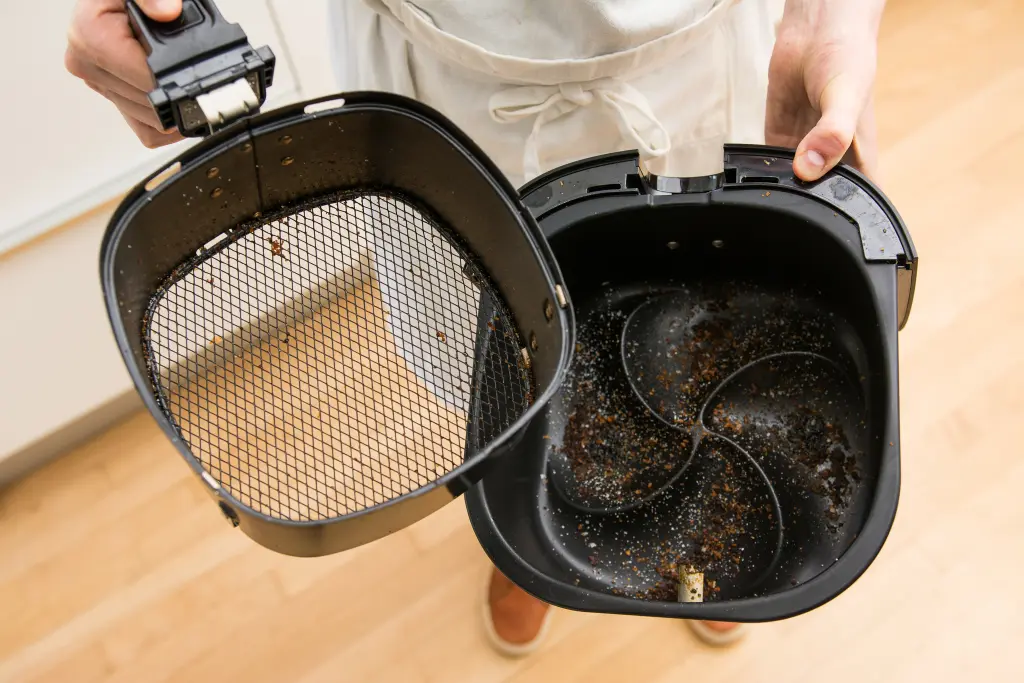
The Step-by-Step Cleaning Guide
Step 1: Unplug and Cool Down Safety first! Always ensure your air fryer is completely unplugged and has had plenty of time to cool down before you begin cleaning. Since cleaning methods can vary between brands, it is also a good idea to quickly check your appliance’s manual for any specific manufacturer guidelines.
Step 2: Wash the Basket and Tray Check your manual to see if the basket and drip tray are dishwasher safe. If they are, popping them in the dishwasher is the easiest way to get a thorough clean.
- Hand Washing: If you need to wash them by hand, use warm water, dish soap, and a soft-bristled brush to gently scrub away grease.
- Baked-On Food Hack: For stubborn, stuck-on grime, fill the basket with warm water, drop in a standard dishwasher tablet, and let it soak for one to two hours before rinsing.
Step 3: Wipe Down the Interior and Heating Element Using a damp microfiber cloth or wet paper towel, gently wipe out the inside of the machine.
- The Heating Element: Do not forget this part! Food particles and grease can easily accumulate on the heating element, affecting performance and creating a fire hazard. Use a soft brush to carefully remove debris.
- The Seals: Gently scrub the rubber seals where grease and odors love to hide, then make sure they are securely reattached.
Step 4: Clean the Exterior and Controls The outside of your air fryer might not be greasy, but it can quickly collect fingerprints and dust. Wipe down the exterior housing and the handles with a damp microfiber cloth. Be extra careful around the digital screens and buttons to avoid causing moisture damage to the electronics.
Step 5: Dry Completely Before Reassembling Before you put the basket back into the main unit, ensure every single component is 100% dry. Trapped moisture inside a closed air fryer can lead to rust and bacterial growth.
Deep Cleaning & Odor Removal
If you frequently cook sticky or greasy foods (like bacon or wings), you will need to deep clean your appliance every few uses.
- To Remove Stubborn Grease: Create a thick paste using water and baking soda. Apply the mixture to the greasy areas inside the fryer and use an old toothbrush to gently scrub the buildup away. Wipe clean with a damp cloth, followed immediately by a dry towel.
Important Warning: Do not mix baking soda and vinegar to clean the interior of your air fryer! While this combination is popular for household cleaning, the resulting chemical reaction can damage the protective coatings inside the appliance. Stick to baking soda and water.
- To Banish Lingering Odors: If your air fryer still smells like last night’s fish, place a small heat-safe dish filled with equal parts white vinegar and lemon juice into the basket. Run the air fryer on a low temperature for 5 to 10 minutes to neutralize the smell.
Pro-Tip: Prevent Grease Buildup
The easiest way to clean an air fryer is to prevent it from getting dirty in the first place! If you are cooking something particularly messy, invest in disposable or reusable silicone air fryer liners to catch the drippings and protect the bottom of the basket.