Tag: Cooking Tips

  • Saucepan vs. Pot: What’s the Difference?

    Saucepan vs. Pot: What’s the Difference?

    By All-Clad Editorial Team | Published: May 16, 2025

    Saucepans and stockpots are essential kitchen pieces, but knowing exactly when to use each can significantly elevate your cooking results. Explore the distinct differences between saucepans and pots with our expert advice, and learn how to pick the right Cookware for your culinary creations.
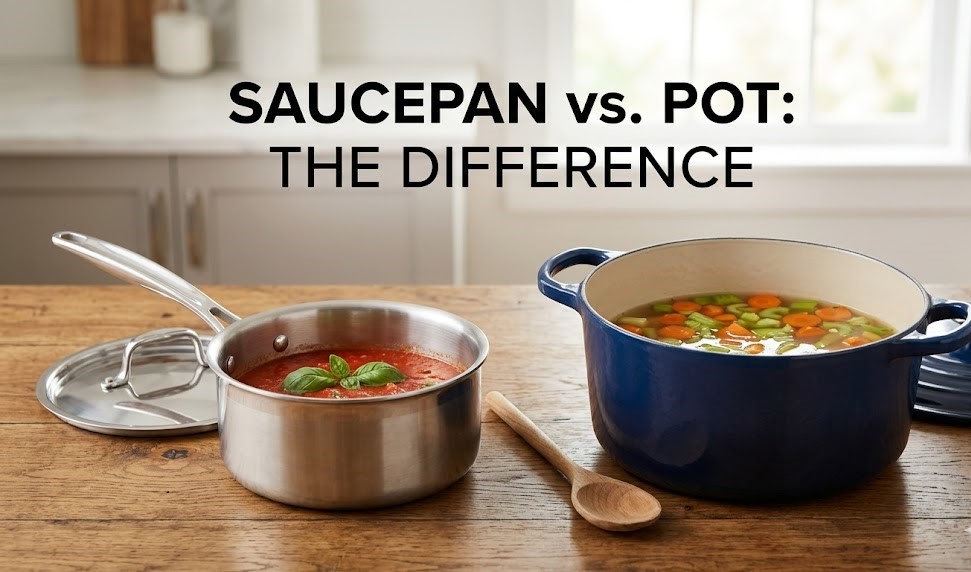
    What Is a Saucepan?

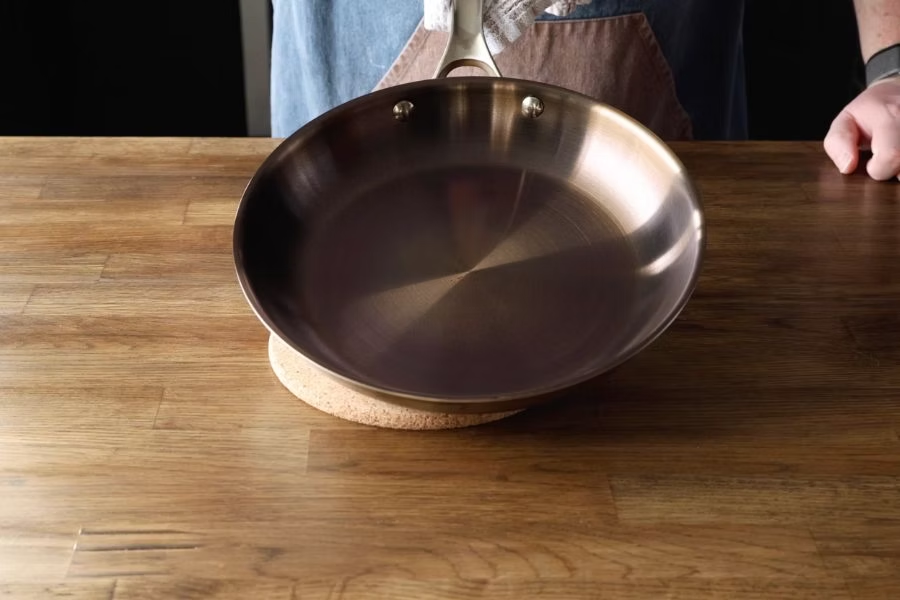
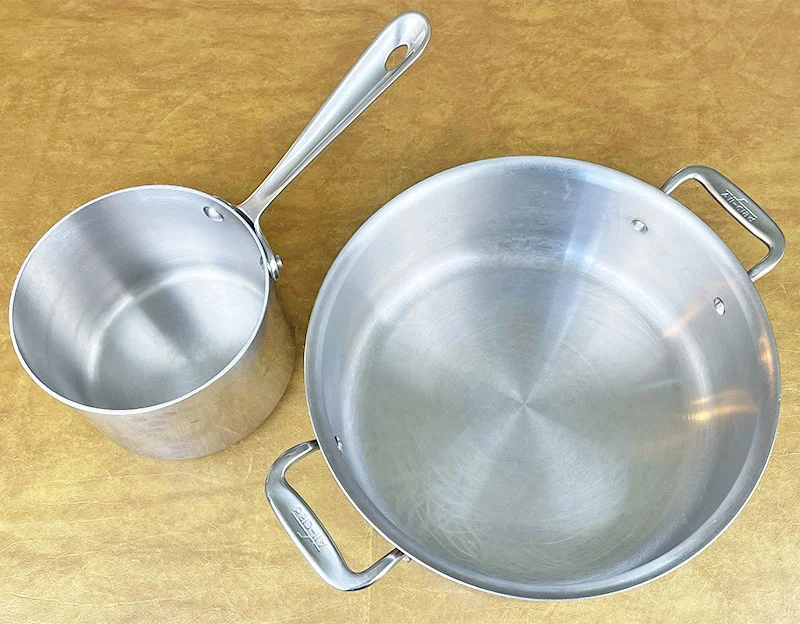
    Distinct in design, a Saucepan features tall, straight sides and a single long handle, making it perfect for creating everything from delicate sauces to deglazing or heating liquids. The smaller surface area ensures superior heat retention while minimizing rapid evaporation.

    • Sizes and Capacity: Stainless steel saucepans typically range from 1 to 4 quarts, offering the right size for focused cooking tasks.
    • Design Features: The flat bottom and straight edges promote incredibly even heating, while a tight-fitting lid easily locks in moisture and flavor during cooking.
    • Best Culinary Uses: From reducing wine sauces to simmering grains, the saucepan excels at liquid-based cooking methods. The carefully engineered design prevents boil-overs and allows for precise temperature control.

    Features and Uses of Stockpots

    A Stock pot brings exceptional performance to your kitchen with deep, straight walls and a wide base. This design maintains consistent temperatures for slow-simmering stews and large-batch cooking.

    • Sizes and Capacity: Master batch cooking with sizes ranging heavily from 4 to 12 quarts.
    • Design Features: Chef-inspired designs include two sturdy handles on either side for confident lifting, while the premium construction ensures even heat distribution from the base all the way to the rim.
    • Best Culinary Uses: The tall edges prevent splashing during heavy boiling. Whether you’re preparing a hearty soup, boiling pasta, or blanching fresh vegetables, these versatile pots deliver exceptional performance.

    How to Choose the Right Cookware

    When preparing your favorite recipes, matching the right cookware to your dish makes all the difference in the world.

    • When to use a Saucepan: For small batches and sauce-based dishes, reach for a saucepan. The precise heat control, tall edges, and narrower surface area help reduce liquids perfectly while preventing hot splatter.
    • When to use a Stockpot: Choose a pot when cooking larger portions or dishes requiring substantially more liquid. The wider base and generous capacity provide ample room for ingredients to move freely. Consider your serving size: a 3-quart saucepan works beautifully for family sides, while an 8-quart pot handles large dinner party portions with ease.

    Caring for Your Cookware

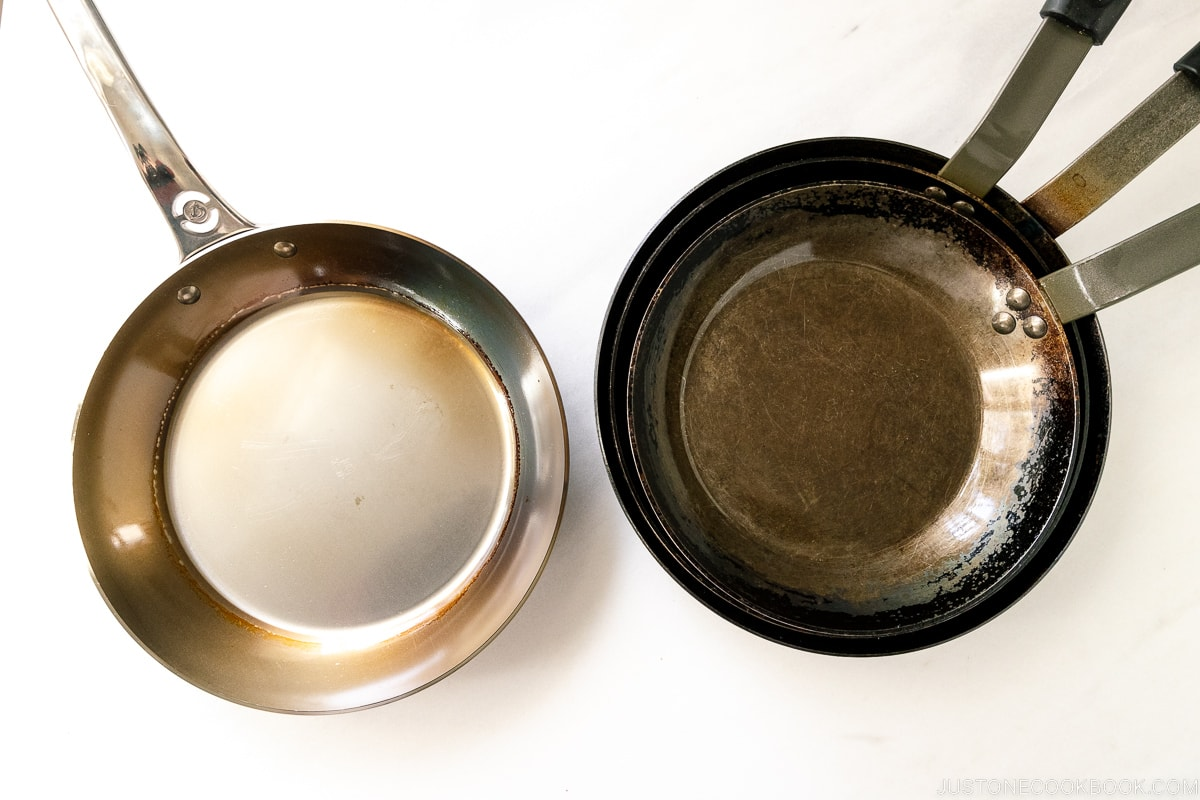
    Maintain your cookware’s brilliant performance by letting it cool completely before cleaning. Hand wash your pots and pans with warm, soapy water and a soft cloth—this gentle approach preserves the Stainless steel finish for a lifetime.

    • Protect the Surface: During cooking, always use wooden or Silicone utensils to protect the cooking surface from unwanted scratches.
    • Prevent Pitting: When cooking with salt, make sure to add it only after liquids have reached a rolling boil to prevent pitting the metal.
    • Control the Heat: Keep heat settings at medium or lower. Multi-layered bonded construction ensures superior heat retention without ever requiring high, scorching temperatures. Match your burner size to your pan’s base for optimal heat distribution.
    • Smart Storage: Store your saucepans and pots with protective cloth layers between them to avoid scratches in your cabinets.

    Elevate Your Cooking

    Transform your kitchen into a professional cooking space. The right cookware becomes your trusted partner in creating memorable meals, whether you’re reducing a delicate sauce or simmering a hearty stew for the whole family. With the right pieces in your kitchen arsenal, you will cook with complete confidence and create dishes that delight.

  • Slow Cooker vs. Pressure Cooker: Which Should You Buy?

    Slow Cooker vs. Pressure Cooker: Which Should You Buy?

    Soups, stews, curries, and melt-in-the-mouth meats: both pressure cookers and slow cookers handle these cozy classics brilliantly. However, the way each appliance goes about cooking them is vastly different, meaning their benefits and drawbacks will cater to entirely different lifestyles.

    If you are wondering whether to add a slow cooker or a pressure cooker to your kitchen counter, here is a comprehensive breakdown of how these clever gadgets work, what they offer, and which one truly suits your daily routine.

    The Main Differences: Time vs. Planning

    The biggest difference between a slow cooker and a pressure cooker comes down to speed.

    While slow cookers use a gentle, low heat to simmer ingredients to perfection over several hours, pressure cookers seal the interior tightly under high pressure, trapping steam to whip up dinner incredibly rapidly.

    “The difference between the two types of cooker is mainly the time you have to spare,” explains Kathryn Farrell, buyer for Lakeland. “A pressure cooker can be up to 90% faster than cooking with a pan on the hob.”

    • The Slow Cooker Lifestyle: Requires you to plan your dishes in advance. You must be organized enough to prep your ingredients in the morning, but it provides the ultimate convenience of arriving home from work to a hot meal that is completely ready to eat.
    • The Pressure Cooker Lifestyle: Requires very little planning. It offers the convenience of deciding what you want for dinner at 5:00 PM and having it fully cooked, tender, and on the table by 5:45 PM.

    Slow Cooker Pros and Cons

    Pros:

    • True Hands-Free Cooking: Slow cookers are the masters of the ‘set and forget’ method. Pop in your ingredients, set the heat, and walk away for 8 hours.
    • Enhanced Flavors: As ingredients heat for hours, there is ample time for rich flavors to mingle, producing incredibly tasty results.
    • Energy Efficient: They use very low wattage, making them highly economical to run all day.

    Cons:

    • Requires Advance Planning: You have to start dinner right after breakfast.
    • Advance Prep Work: If your recipe includes meat or onions, you usually have to brown them in a separate pan on the hob before adding them to the slow cooker (unless your model features a sauté function).
    • Mushy Textures: Certain vegetables can become overly soft and mushy if left in the pot for too long.

    Pressure Cooker Pros and Cons

    Pros:

    • Lightning Fast: They produce tender meat, perfectly cooked pulses, and hearty stews in a fraction of the time.
    • Locks in Nutrients: “The shorter cooking time and sealed environment help to preserve vitamins and minerals that can be lost through prolonged cooking,” reveals Sarah Farquharson from Instant Pot.
    • Versatile: Most modern electric pressure cookers (often called multicookers) can also sauté, steam, and even make yogurt.

    Cons:

    • Steeper Learning Curve: Pressure cookers are less ‘set and forget.’ They require you to understand pressure release valves and specific liquid ratios.
    • More Expensive: While a basic slow cooker is very cheap, a quality electric pressure cooker is a larger upfront investment.

    Head-to-Head Comparison

    FeatureSlow CookerPressure Cooker
    Cooking SpeedVery Slow (4 to 8 hours)Very Fast (15 to 45 minutes)
    Best ForLarge families, batch cooking, stews.Busy professionals, last-minute meals, risotto.
    Hands-On TimeHigh at the start (morning prep).Medium (requires some monitoring).
    Price Range£30 – £200£60 – £200+

    Which is Best For You?

    Buy a Pressure Cooker if: You have a busy lifestyle with zero time for morning food prep before dashing out the door. If you want the ability to make hearty, comforting meals from scratch after you get home from work, a pressure cooker is your best friend.

    Buy a Slow Cooker if: You are cooking for a large family and everyone eats at different times. Slow cookers are ideal for batch cooking on weekends and keeping food warm safely for hours on end.

    The Ultimate Compromise: The Multicooker

    What if you cannot decide? If you want the convenience of arriving home to a slow-cooked stew on a Tuesday, but need to pressure-cook a fast batch of rice on a Wednesday, invest in a hybrid multicooker (like the Ninja Foodi or Instant Pot).

    A multicooker saves on both space and cost, offering a massive range of techniques in a single, versatile appliance, giving you the luxury of both time-saving speed and slow-cooked comfort!

  • Blenders vs. Food Processors: Which is Right for Your Kitchen?

    Blenders vs. Food Processors: Which is Right for Your Kitchen?

    If you enjoy getting creative in the kitchen, you might be looking for a new appliance to take your culinary flair to the next level. However, choosing between a food processor and a blender can be rather confusing, with many people mistakenly believing that they offer the exact same qualities and functions.

    To help you make the right investment, we consulted kitchen appliance experts to expose the strengths and weaknesses of each gadget. Whether you are hunting for the best blender for morning smoothies or a processor to make weekly meal prep a breeze, here is everything you need to know.

    What Can a Blender Do That a Food Processor Can’t?

    Thanks to the design of its tall jug and upward-facing blades, a blender can easily transform ingredients into smoothies, drinks, dips, soups, and sauces.

    “Blenders, in general, can produce a smoother consistency more quickly for low viscosity liquids,” explains Stephen Catherall, UK sales manager at Magimix. “This is great for things like smoothies with harder and tougher ingredients and silky-smooth soups.”

    Furthermore, many high-powered blenders can effortlessly crush ice, making them the perfect tool for finishing off summer cocktails or frozen drinks.

    What Can a Food Processor Do That a Blender Can’t?

    Due to the rounder, wider bowl and S-shaped blade, a food processor is built to tackle ingredients in a completely different way.

    “Any food that you would consider cutting with a knife on a chopping board will produce better results in a food processor than in a blender,” says Stephen. “Think chopping herbs, onions, carrots, garlic, celery, or nuts.” Even meat can be chopped easily in a food processor as it doesn’t get stuck under the blades.

    Food processors excel at:

    • Grating & Slicing: Perfect for shredding cheese, carrots, beetroot, or slicing courgettes into ribbons for quick, tasty salads.
    • Kneading Dough: Food processors knead dough successfully, whereas blender blades spin far too fast for effective dough kneading.
    • Dicing & Whisking: Many processors come with specialized attachments to help you achieve professional-level food prep.

    Pros and Cons: The Head-to-Head Comparison

    The Food Processor

    “Food processors offer fantastic multifunctionality in the kitchen and can help you produce a wide variety of dishes,” explains Steven Carter-Bailey, food expert at ProCook. “They are better at producing coarse or fine consistencies, as well as everything in between—you have more control than with a blender.”

    • Pros: Highly versatile, great for solid foods, multiple attachments for slicing/grating, speeds up meal prep.
    • Cons: Often large and bulky to store, can be fiddly to clean, and some models produce quite a lot of noise.

    The Blender

    “One advantage of a blender is that it has a smaller footprint, so it can sit neatly in one area of the kitchen worktop,” notes Steven. “Blenders are also quick and easy to clean, with the jug often being dishwasher safe.”

    • Pros: Quick and easy to use, perfect for silky smooth liquids, compact footprint, great for crushing ice.
    • Cons: Blades are not as sharp (making them less effective for thick/dry ingredients), and the design can lead to blockages if there isn’t enough liquid in the jug.

    How Much Should You Spend?

    • Blenders: Prices start around £29.99 for personal, on-the-go bullet models and can increase to £600 for robust, professional-grade jug styles.
    • Food Processors: Budget solutions start around £74.99, with prices ranging up to £800+ for expert models featuring a massive host of attachments and large capacities.

    Generally, blenders are more affordable. However, if your main goal is cutting down on daily food preparation and chopping time, a food processor is a highly justifiable purchase.

    Which One is Best For You?

    The right choice comes down entirely to your cooking habits:

    • Choose a Blender if: You frequently prepare your own sauces, purees, and smoothies. If you love healthy beverages on the go or need to crush ice, a blender is the perfect addition to your kitchen. Expert Pick: Salter NutriPro for compact power, or the Salter PowerPro for large batch blending.
    • Choose a Food Processor if: You want to conquer diverse cooking tasks like chopping, slicing, shredding, and baking. It is the undisputed champion for home bakers, busy families, and budding kitchen connoisseurs. Expert Pick: The Magimix 4200XL (for average families) or 5200XL (for large crowds).
  • How to Season a Carbon Steel Pan: A Step-by-Step Guide

    How to Season a Carbon Steel Pan: A Step-by-Step Guide

    So, you just invested in a brand new carbon steel pan, but the surface feels rough, and your eggs are sticking like glue. Don’t panic! Before you can achieve that coveted, slide-around-the-pan non-stick perfection, you have to season it.

    Seasoning is the crucial process of baking oil into the metal to create a natural, slick patina that prevents rust and makes cooking a breeze. If you are unsure where to start, here is a complete, easy-to-follow guide on exactly how to season your carbon steel pan like a pro.

    Why Do You Need to Season Carbon Steel?

    Unlike Teflon-coated pans that degrade over time, carbon steel actually gets better the more you use it. However, out of the box, the raw iron and carbon blend is highly susceptible to rust and sticking.

    Seasoning bonds cooking oil to the iron at a molecular level (a process called polymerization). This creates a hard, protective, non-stick layer. Over time, your pan will transition from a shiny silver to a deep, beautiful black patina.

    Choosing the Right Oil

    Before you begin, you need the right oil. You must choose an oil with a high smoke point that can withstand intense heat without burning away.

    • Best Oils to Use: Grapeseed oil, avocado oil, canola oil, soybean oil, or sunflower oil.
    • Oils to Avoid: Butter, extra virgin olive oil, or unrefined coconut oil (their smoke points are too low and will burn, leaving a sticky residue).

    The 7-Step Seasoning Process

    Step 1: Remove the Protective Coating Most new pans ship with a thin layer of beeswax or factory oil to prevent rust during transit. You must remove this before seasoning. Scrub the pan vigorously using very hot water, dish soap, and a non-abrasive sponge until the metal feels completely bare.

    Step 2: Dry the Pan Completely Towel dry the pan, then place it on the stove over low heat for a few minutes. This ensures every microscopic drop of moisture evaporates, preventing trapped water from causing rust under your new seasoning layer.

    Step 3: Heat the Pan Turn the burner up to medium-high heat. Let the dry pan sit for 5 to 10 minutes until it is thoroughly heated. This opens up the metal’s pores so it can properly absorb the oil.

    Step 4: Apply the Oil (Sparingly!) This is the most important step. Apply a few drops of your chosen high-smoke-point oil to a paper towel. Carefully wipe the entire surface of the pan—inside, outside, and the handle.

    • Crucial Tip: You want the thinnest layer possible. After applying the oil, take a clean paper towel and wipe the pan down again as if you made a mistake and are trying to remove all the oil. If the oil goes on too thick, your pan will end up sticky and splotchy.

    Step 5: Burn It On Place the oiled pan back on the stove over high heat. Leave it there until the oil begins to smoke heavily (ensure your kitchen is well-ventilated!). Let it smoke for about 10 minutes until the smoke subsides and the pan begins to change color. Turn off the heat and let the pan cool completely.

    Step 6: Repeat the Process One layer is rarely enough for a brand new pan. For the best non-stick results, repeat Steps 3 through 5 at least two or three more times to build a solid foundational patina.

    Step 7: Cook and Maintain! The absolute best way to build your seasoning is simply to cook with the pan! Frequent use with cooking fats will naturally deepen the black patina over time.

    How to Clean Your Seasoned Pan

    Once your pan is seasoned, do not use harsh soaps or wire scrubbers.

    1. Rinse the pan with hot water.
    2. Gently scrub away food particles with a soft brush or coarse sea salt.
    3. Dry the pan completely on the stove over low heat.
    4. Wipe a microscopic layer of oil over the cooking surface before storing it to prevent ambient moisture from causing rust.

    Also Read : Carbon Steel vs. Cast Iron: The 2026 Heavyweight Skillet Showdown

  • LPG vs. Induction Stove: Which is Better for Your Kitchen?

    LPG vs. Induction Stove: Which is Better for Your Kitchen?

    Modern households are increasingly opting for induction stoves due to their sleek design and quick heating abilities. However, Liquefied Petroleum Gas (LPG) still firmly holds its ground as the reigning champion in many Indian kitchens.

    If you find yourself caught in the great “LPG vs. Induction” debate and are wondering which option is cheaper or more efficient for your daily cooking, here is a comprehensive breakdown of why traditional gas might still be your best bet.

    5 Reasons Why You Should Choose LPG Over an Induction Stove

    1. Faster Cooking and High Energy Output LPG has a significantly higher calorific value compared to electricity, meaning it delivers more energy per unit of consumption. LPG offers a calorific value of around 11,950 kcal/kg, in stark contrast to electricity’s direct conversion of around 860 kcal/kWh. Because LPG stoves provide instant, intense heat, boiling water or cooking meals can often be much faster than waiting for an electric element to reach peak temperature.

    2. Unmatched Versatility and Compatibility Many traditional Indian cooking techniques—such as tempering (tadka), roasting, and direct-flame grilling (phulkas)—are much more efficiently executed on an open flame. Furthermore, LPG stoves can accommodate a massive variety of cookware, including copper, aluminum, and clay pots. Conversely, induction cooking strictly requires specialized pots and pans with a magnetic, ferromagnetic bottom to function at all.

    3. Lower Initial Costs and High Accessibility While the daily cost of using LPG versus electricity varies by region depending on utility rates, LPG is often more cost-effective in the long run, especially during peak hours when premium electrical tariffs apply. Additionally, the initial setup is much cheaper. LPG stoves are generally highly affordable and do not require the specialized heavy-duty electrical wiring that high-wattage induction cooktops demand.

    4. Immediate Control and Heat Distribution Professional chefs prefer gas for a reason: it provides immediate, precise control over flame intensity. This allows for rapid temperature adjustments right in the middle of the cooking process. Because the flame physically wraps around the bottom of the pan, LPG also allows for even heat distribution on curved cookware like woks and kadhais, which struggle on the flat glass surface of an induction stove.

    5. Reliability During Power Outages Despite ongoing advancements in India’s electricity generation and distribution grid, many areas—especially rural and remote regions—still grapple with inconsistent power supplies and frequent load shedding. LPG is a highly portable and storable fuel, presenting a completely reliable alternative that ensures your family’s dinner is never delayed by a blackout.

    The Final Verdict: Why You Need a SUPERGAS Connection

    In the ongoing discussion of gas cylinders vs. induction stoves, it is clear that LPG remains the preferable choice for the average Indian household, offering safety, cost-effectiveness, and total culinary flexibility.

    However, the key to maximizing these benefits lies in choosing the right supplier. SUPERGAS stands out as the ideal partner for your kitchen needs:

    • Punctual Delivery: With a promise of on-time and anytime delivery across a vast network, you are assured never to face cooking delays.
    • Uncompromising Safety: A strict commitment to safety standards benefits employees, customers, and end-users alike.
    • Complete Support: From providing new connections within 24 hours to installing advanced leak detection systems, SUPERGAS ensures total peace of mind.

    Also Read : Carbon Steel vs. Cast Iron: The 2026 Heavyweight Skillet Showdown