So, you just invested in a brand new carbon steel pan, but the surface feels rough, and your eggs are sticking like glue. Don’t panic! Before you can achieve that coveted, slide-around-the-pan non-stick perfection, you have to season it.
Seasoning is the crucial process of baking oil into the metal to create a natural, slick patina that prevents rust and makes cooking a breeze. If you are unsure where to start, here is a complete, easy-to-follow guide on exactly how to season your carbon steel pan like a pro.
Why Do You Need to Season Carbon Steel?
Unlike Teflon-coated pans that degrade over time, carbon steel actually gets better the more you use it. However, out of the box, the raw iron and carbon blend is highly susceptible to rust and sticking.
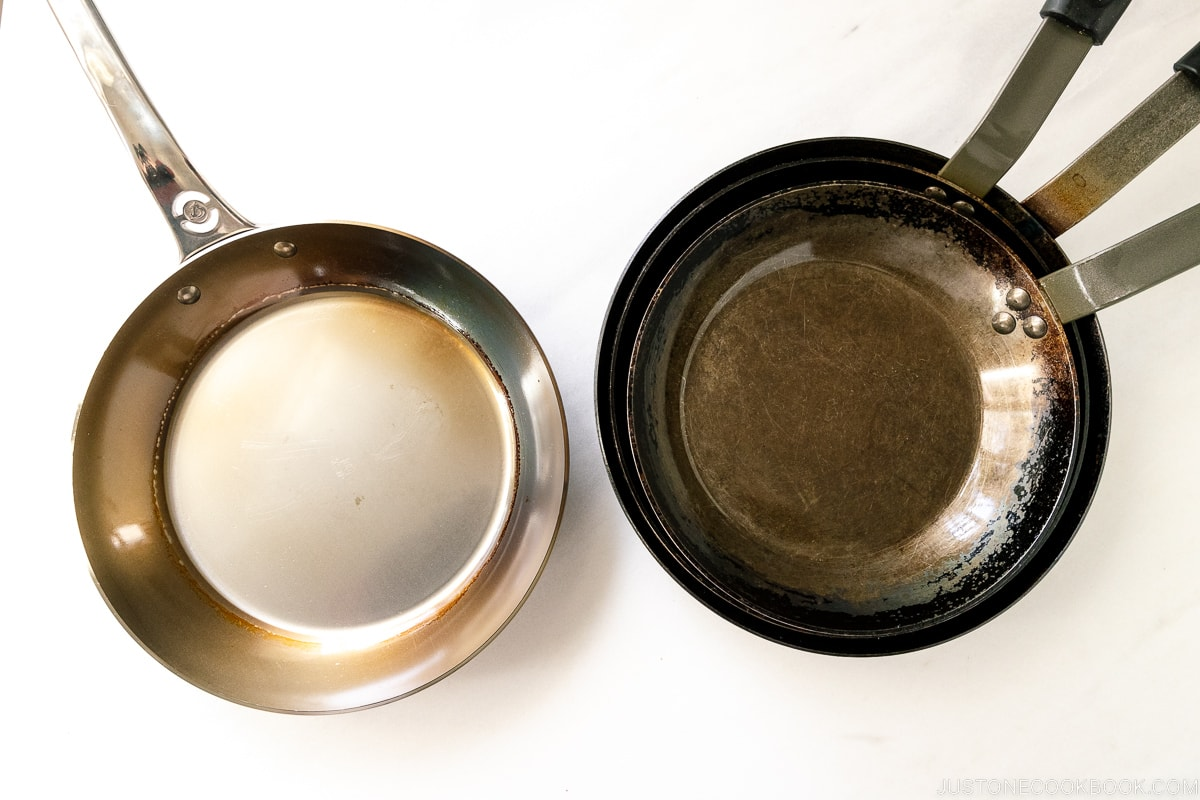
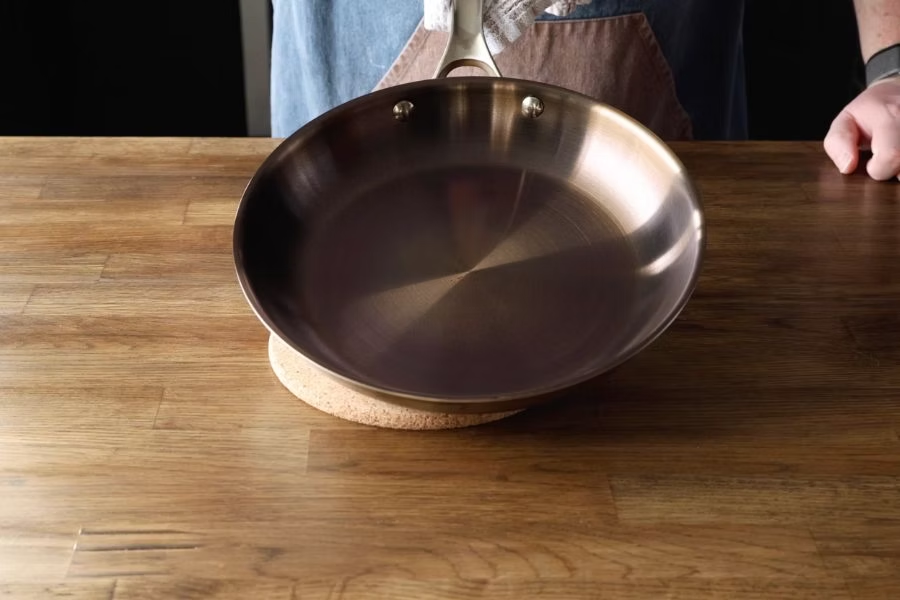
Seasoning bonds cooking oil to the iron at a molecular level (a process called polymerization). This creates a hard, protective, non-stick layer. Over time, your pan will transition from a shiny silver to a deep, beautiful black patina.
Choosing the Right Oil
Before you begin, you need the right oil. You must choose an oil with a high smoke point that can withstand intense heat without burning away.
- Best Oils to Use: Grapeseed oil, avocado oil, canola oil, soybean oil, or sunflower oil.
- Oils to Avoid: Butter, extra virgin olive oil, or unrefined coconut oil (their smoke points are too low and will burn, leaving a sticky residue).
The 7-Step Seasoning Process
Step 1: Remove the Protective Coating Most new pans ship with a thin layer of beeswax or factory oil to prevent rust during transit. You must remove this before seasoning. Scrub the pan vigorously using very hot water, dish soap, and a non-abrasive sponge until the metal feels completely bare.
Step 2: Dry the Pan Completely Towel dry the pan, then place it on the stove over low heat for a few minutes. This ensures every microscopic drop of moisture evaporates, preventing trapped water from causing rust under your new seasoning layer.
Step 3: Heat the Pan Turn the burner up to medium-high heat. Let the dry pan sit for 5 to 10 minutes until it is thoroughly heated. This opens up the metal’s pores so it can properly absorb the oil.
Step 4: Apply the Oil (Sparingly!) This is the most important step. Apply a few drops of your chosen high-smoke-point oil to a paper towel. Carefully wipe the entire surface of the pan—inside, outside, and the handle.
- Crucial Tip: You want the thinnest layer possible. After applying the oil, take a clean paper towel and wipe the pan down again as if you made a mistake and are trying to remove all the oil. If the oil goes on too thick, your pan will end up sticky and splotchy.
Step 5: Burn It On Place the oiled pan back on the stove over high heat. Leave it there until the oil begins to smoke heavily (ensure your kitchen is well-ventilated!). Let it smoke for about 10 minutes until the smoke subsides and the pan begins to change color. Turn off the heat and let the pan cool completely.
Step 6: Repeat the Process One layer is rarely enough for a brand new pan. For the best non-stick results, repeat Steps 3 through 5 at least two or three more times to build a solid foundational patina.
Step 7: Cook and Maintain! The absolute best way to build your seasoning is simply to cook with the pan! Frequent use with cooking fats will naturally deepen the black patina over time.
How to Clean Your Seasoned Pan
Once your pan is seasoned, do not use harsh soaps or wire scrubbers.
- Rinse the pan with hot water.
- Gently scrub away food particles with a soft brush or coarse sea salt.
- Dry the pan completely on the stove over low heat.
- Wipe a microscopic layer of oil over the cooking surface before storing it to prevent ambient moisture from causing rust.
Also Read : Carbon Steel vs. Cast Iron: The 2026 Heavyweight Skillet Showdown