Category: Kitchen

  • Silicone vs. Metal Baking Molds: Choosing for Best Results

    Silicone vs. Metal Baking Molds: Choosing for Best Results

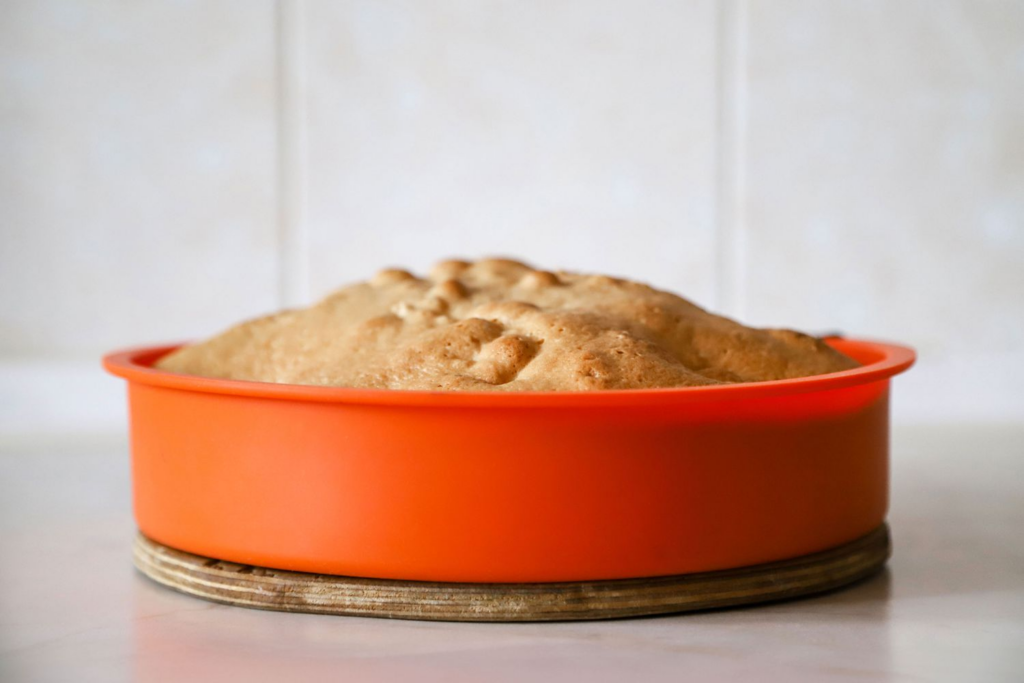
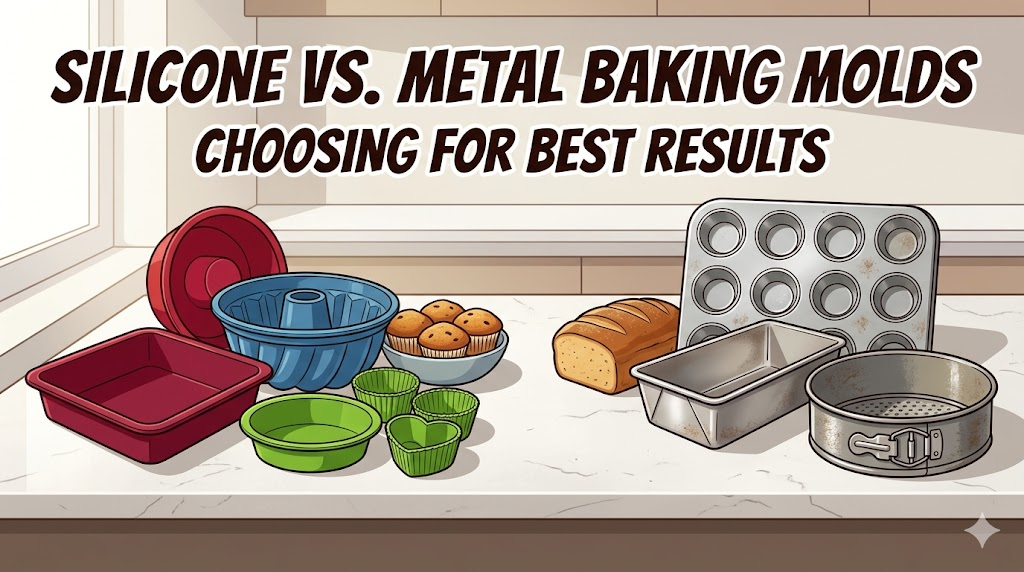
    When it comes to baking, the debate between silicone molds and metal pans is a hot topic. Having baked countless treats, it becomes clear that the choice of bakeware can make a massive difference in the outcome. Silicone molds have gained popularity for their non-stick properties and extreme flexibility, but are they truly better than classic metal pans?

    Let’s explore the pros and cons of each material, from heat distribution to long-term durability. Whether you are a seasoned baker or just starting out, understanding these fundamental differences can elevate your baking game. Here is a breakdown of which material reigns supreme in the kitchen.

    Handling and Maintenance

    Baking in silicone molds and metal pans yields significant differences in both preparation and the end result.

    • Silicone Molds: One of their standout features is the ease of handling. They are lightweight and can be twisted or bent, allowing for easy release of baked goods once they are done. Maintenance is also straightforward—a quick hand wash or a cycle in the dishwasher, and they are good to go.
    • Metal Pans: These often require a bit of prep before baking. You generally need to grease or line metal pans to prevent sticking, which isn’t usually necessary with silicone. However, their durability is a strong point. Metal pans can handle high temperatures without warping and, if cared for properly, will last for decades.

    Heat Distribution and Baking Time

    • Metal Pans: Metal is excellent at distributing heat. This promotes uniform baking and browning, which is vital for baked goods like bread and cookies. The heat retention in metal is also higher, meaning your treats stay warmer for longer once they are out of the oven.
    • Silicone Molds: While silicone can withstand an array of temperatures, it is an insulator rather than a conductor, so it doesn’t match up to metal when it comes to heat distribution. Baking in silicone molds might take a tad longer, as they don’t transfer heat as rapidly. Yet, this can be an advantage for items that benefit from a gentler bake, such as cheesecakes, custards, and delicate muffins.

    Versatility and Innovation

    The market has embraced silicone for its unmatched versatility. From popsicle molds to cake pans shaped like cartoon characters, silicone has made it possible to get incredibly creative with designs. Bakers who enjoy novelty or custom shapes will find a treasure trove of options with silicone molds.

    Metal pans might not offer the same variety in novelty shapes, but they are an absolute staple for classic designs and remain unmatched when it comes to achieving sharp edges and professional-looking tiered cakes.

    The Key Benefits of Silicone Molds

    1. Gentle Heat Distribution

    Silicone molds are engineered to withstand a wide range of temperatures, which is crucial for any baking endeavor. While they might not be as conductive as metal, silicone ensures uniform, gentle heat distribution. This means when batter is poured into silicone molds, the heat from the oven circulates evenly, reducing the risk of undercooked spots or overdone edges. Plus, silicone’s ability to handle extreme temperatures (from the freezer straight to the oven) makes it highly versatile.

    2. Non-Stick Surface

    One of the standout benefits of silicone molds is their inherently non-stick surface. This feature eliminates the necessity for greasing or flouring pans, saving time and reducing the amount of additional fat introduced into your baked goods. The non-stick quality also means that cakes and muffins slide out with ease, maintaining their perfect shapes and intricate details without the need for excessive prying or tapping.

    3. Ultimate Flexibility

    The flexibility of silicone molds is a game-changer for bakers. Not only does it contribute to the non-stick properties, but it also allows for:

    • Easy storage, as they can be folded into drawers without damage.
    • Simplified removal of baked items by just pushing up from the bottom of the mold.
    • Endless creativity with a vast array of shapes and designs.

    The Key Benefits of Metal Molds

    1. Unmatched Durability

    When talking about baking tools that can endure the test of time, metal molds always come to mind. They are renowned for their strong resilience to wear and tear. Unlike silicone, metal doesn’t degrade as easily with frequent use. Metal molds do not warp, crack, or lose their shape even after countless trips to a 450°F oven. Additionally, they are impervious to sharp objects, meaning you can cut or slice directly in the pan (if it lacks a non-stick coating) without worrying about damage.

    Tips for maintaining metal molds:

    • Hand wash with warm, soapy water to prevent discoloration and protect any non-stick coatings.
    • Dry promptly after washing to avoid rust formation.
    • Store in a dry, cool place.

    2. Superior Heat Conductivity

    Metal molds boast excellent heat conductivity. This property enables them to heat up quickly and evenly, ensuring a consistent bake every time. Metal pans are particularly good for achieving a well-browned crust on the bottoms and edges of baked goods. Recipes involving precise temperatures and crispy finishes, like tarts and artisan pies, often turn out best with metal.

    Baking tips for metal pans:

    • Adjust oven temperatures slightly downward if a recipe was written for glass or silicone, as metal heats more quickly and intensely.
    • Monitor your baking closely during the final minutes to prevent over-browning.

    Differences in Baking Results: Browning and Crisping

    When it comes to baking, the results can vary significantly depending on the material used. One key difference lies in the browning and crisping of baked goods.

    Metal molds, with their rapid heat transfer, are excellent for achieving a golden-brown crust. The exterior of items like pastries and bread develops a beautiful and crispy shell, providing that artisan-like quality sought by professional bakers. To get the most out of your metal molds, you can even preheat them before filling to initiate that immediate crust formation upon the batter’s contact with the hot surface.

    Silicone molds, due to their insulating properties, tend to lack in this department. They distribute heat gently and evenly, which equates to a softer, chewier crust. This is often preferred for certain types of light cakes or cupcakes, but if you are aiming for a crispy or flaky texture, metal molds will serve you much better.

    Which is Best for Convection Baking?

    When utilizing a convection bake setting, metal pans are generally ideal as they conduct heat rapidly and promote the even browning that convection fans are designed to enhance. Silicone molds can also be used in a convection oven, but you may need to adjust the baking time and temperature to account for the material’s insulating nature.

    The Final Verdict

    Choosing the right mold for your baking project is essential for achieving the perfect texture and crust. Whether you are aiming for a crispy golden edge or a soft, delicate finish, the decision between silicone and metal molds makes all the difference.

    Trust your baking instincts and let the desired outcome guide your choice. With the right mold, you will elevate your baking game and delight in the delicious results. Happy baking!

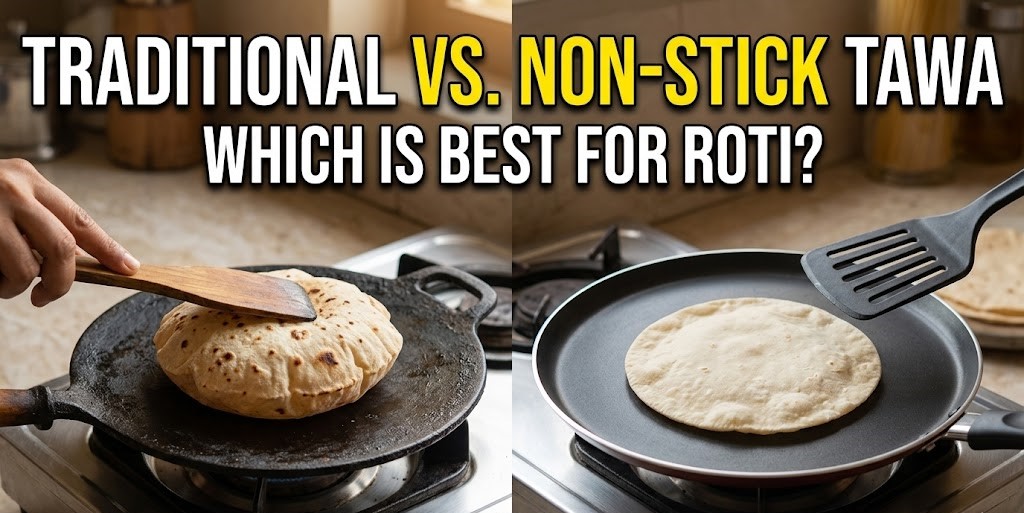
    Also Read : Traditional vs. Non-Stick Roti Tawas: Making the Right Choice

  • Dishwasher vs. Handwashing: Which is the Most Efficient Method?

    Dishwasher vs. Handwashing: Which is the Most Efficient Method?

    Which? tests show that even the least efficient dishwasher uses a fraction of the water compared to washing by hand. They’re often more energy-efficient, too.

    Our in-depth testing has found that dishwashers, on average, use almost 80% less water per full wash than washing up by hand. Switch to eco mode, and a dishwasher uses even less water. Even a relatively inefficient model still trounces handwashing in terms of water use.

    Here, we break down how water and energy use compare between using a dishwasher and handwashing dishes in the kitchen sink.

    Dishwashers vs. Handwashing: Capacity

    When washing up by hand, we estimate you can clean around two “place settings” with one washing-up bowl (with an average capacity of nine litres) before you need to empty and refill it.

    However, most dishwashers don’t just wash one or two place settings at a time. We’ve tested some full-sized models that will do up to 16 sets in one wash. Slimline dishwashers will handle around eight to 11 place settings, and even compact dishwashers will do four to six place settings.

    So, all conventional dishwasher types will wash considerably more dishes in a single cycle compared to handwashing.

    What constitutes a place setting?

    TheAssociation of Home Appliance Manufacturers (AHAM)defines one place setting as: a cup, saucer, dinner plate, side plate, fruit bowl, glass, dinner fork, salad fork, knife, and two teaspoons.

    Do Dishwashers Use More Water?

    No, quite the opposite.

    Handwashing effectively uses 4.5 litres of water per place setting. However, based on a sample of recently tested dishwashers (including a mix of efficient and not-so-frugal models), we estimate that it takes just under one litre of water per place setting in a dishwasher.

    Washing 14 place settings by hand would use an incredible 63 litres of water. Compare that to an average of 12.96 litres when using the main wash cycle on our sample of dishwashers. Switch to eco mode, and that drops down to just 696 millilitres per place setting—or just under 10 litres for 14 place settings.

    There really is no debate: dishwashers use significantly less water than handwashing.

    Method of WashingAvg. Water Per Place SettingAvg. Water Per 14 Place Settings
    Handwashing4.5 litres63 litres
    Dishwasher (Main Wash)926 millilitres12.96 litres
    Dishwasher (Eco Mode)696 millilitres9.74 litres

    (Based on a mixed sample of 33 recently tested dishwashers, including a variety of full-sized and slimline models, and mixed water-efficiency scores).


    What About Energy Use?

    This is where the comparison gets a little trickier.

    Dishwashers on average use about 1.12kWh of energy per wash, which costs roughly 26.5p*. How much energy is used to heat up water for your washing-up bowl will depend entirely on your home’s heater.

    If you have a gas-heated water tank, it isn’t an easy comparison, as gas is typically cheaper than electricity. If using an electric immersion heater that is 3kW, it will cost roughly 11p* to heat up a nine-litre washing-up bowl.

    That is obviously cheaper than running the dishwasher, but just remember: that bowl will only wash two place settings, whereas the dishwasher will clean considerably more (up to 16!). Once you refill the sink multiple times to match the dishwasher’s capacity, the dishwasher becomes the clear winner.

    *Based on the April 2026 energy price cap of 24.67p per kWh.


    Buying Advice

    When shopping for an efficient, reliable appliance, it always helps to buy the best that you can afford.

    Our Best Buy dishwashers start from around £250. We’ve also tested and recommended Great Value dishwashers starting from just under £300, and Eco Buy dishwashers that can save you even more money in the long run.

    You can browse our extensive dishwasher reviews to filter by Best Buy, Great Value, or Eco Buy. You can even filter by annual running costs, brand, price range, and our rigorous test results to find the perfect fit for your kitchen and your wallet.

    Also Read : Paper Towels vs. Cloth Towels: The Ultimate Guide to Hygiene and Sustainability

  • Paper Towels vs. Cloth Towels: The Ultimate Guide to Hygiene and Sustainability

    Paper Towels vs. Cloth Towels: The Ultimate Guide to Hygiene and Sustainability

    The debate between disposable and reusable cleaning materials has evolved significantly as we move deeper into 2026. While the battle once centered purely on cost, modern consumers now weigh Hygiene against Environmental sustainability. When keeping a kitchen sanitized, the choice between paper and cloth involves understanding bacterial growth patterns, resource depletion, and the emergence of alternative plant-based fibers.

    1. The Hygienic Superiority of Paper Towels

    In a post-pandemic world, the priority for many households has shifted toward preventing cross-contamination. Paper towels offer a “single-use, single-surface” advantage that is difficult to replicate with textiles.

    • Bacterial Boom Towns: Studies show that cloth dish towels are often the most contaminated items in the kitchen. Even with rigorous laundering, they can harbor Escherichia coli (E. coli) and Salmonella due to food particles and lingering moisture trapped in the fibers.
    • The Cross-Contamination Risk: Using a cloth towel to wipe a counter after preparing raw chicken, and then using that same towel (even if rinsed) to dry hands or wipe a dining table, creates a high-velocity bridge for pathogens.
    • One-Time-Use Safety: Paper towels are discarded immediately after contact with a mess. This ensures that the microbial load of a specific spill is removed from the kitchen environment entirely rather than redistributed.

    2. Practical Advantages: Convenience and Speed

    Beyond health, the practicality of Paper towels remains a primary driver for their widespread use in busy 2026 households.

    • Grab-and-Go Functionality: Paper towels require zero maintenance. They are ultra-absorbent, consistent in quality, and eliminate the need for extra “small-load” laundry cycles that specifically target soiled rags.
    • Economic Hidden Costs: While cloth towels seem cheaper because they are reusable, their “lifetime cost” includes electricity for high-heat washing cycles, water consumption, and chemical detergents. In 2026, with rising utility rates, the gap between disposable and reusable costs has narrowed significantly.
    • Multi-Purpose Versatility: Beyond cleaning, paper towels are essential for:
      • Food Prep: Soaking up excess grease from fried foods or drying proteins before searing.
      • Kitchen Maintenance: Lining vegetable crisper drawers to absorb moisture and extend the shelf life of produce.
      • Composting: Many modern, unbleached paper towels are now fully home-compostable, serving as a “brown” (carbon-rich) ingredient in the composting process.

    3. The Drawbacks of Cloth Towels

    The primary criticism of cloth towels involves their maintenance and the invisible risks associated with damp organic fibers.

    • Odor and Proliferation: That familiar “sour” smell in kitchen towels is actually the metabolic byproduct of multiplying bacteria. These olfactory offenders often require heavy-duty bleaching agents or extremely high-temperature washes to eliminate—both of which degrade the fabric over time.
    • Maintenance Burnout: To keep cloth towels truly sanitary, a household must rotate through a large inventory and maintain a strict cleaning schedule. Failure to do so transforms a “cleaning tool” into a “germ spreader.”
    • Resource Intensive: Frequent laundering of cloth consumes a massive amount of water and thermal energy. Over a two-year lifespan, a single cloth towel used daily and washed bi-weekly can consume more net energy than the production of its equivalent in sustainable paper.

    4. Environmental Considerations and Sustainable Innovations

    In 2026, the “disposable is bad” narrative has been challenged by the rise of highly renewable materials that offer the convenience of paper with a much lower ecological footprint.

    • The Rise of Bamboo: Unlike trees, which can take 20 to 30 years to reach maturity, Bamboo is a fast-growing grass that can be harvested in just 3 to 5 years. Bamboo paper towels provide a sturdier, more absorbent fiber that is naturally biodegradable.
    • Recycled Pulp: Post-consumer recycled paper towels give a second life to materials that would otherwise occupy landfills. These towels use significantly less water and 20% less energy during production compared to virgin wood pulp products.
    • Biodegradability vs. Durability: Leading brands in 2026, such as Reel Paper, have engineered sustainable paper products to be “plastic-free” in their packaging and “biodegradable” in their lifecycle, directly addressing the waste concerns of traditional paper products.
  • Traditional vs. Non-Stick Roti Tawas: Making the Right Choice

    Traditional vs. Non-Stick Roti Tawas: Making the Right Choice

    The humble roti is a staple flatbread that holds a special place in homes worldwide. However, achieving the perfect texture—soft, yet well-cooked—often sparks a sizzling debate: should you use a Tava made of traditional iron or a modern non-stick surface? Both options offer unique culinary advantages and maintenance considerations that influence your daily cooking experience.

    Traditional Tawas: Embracing Culinary Roots

    For those who value heritage and a robust flavor profile, traditional tawas—typically made of Cast iron or unglazed clay—are often considered the gold standard.

    • Superior Heat Retention: Cast iron is renowned for its ability to absorb, retain, and evenly distribute heat. This ensures that rotis are cooked thoroughly without hot spots.
    • Flavor Profile: A well-seasoned traditional tawa imparts a distinct, earthy “char” and aroma to the bread that modern coatings cannot replicate.
    • Generational Durability: These tawas are virtually indestructible. With proper seasoning to prevent Rust, they can be passed down through generations.
    • Health Benefits: Cooking on cast iron can naturally add trace amounts of iron to your diet, and unglazed clay is celebrated for maintaining the nutritional value of the dough.

    Modern Non-Stick Tawas: Convenience and Innovation

    In a fast-paced modern kitchen, the non-stick tawa has revolutionized how we prepare flatbreads by focusing on efficiency and health-conscious cooking.

    • Minimal Oil Usage: The primary advantage of a non-stick coating (often Polytetrafluoroethylene or ceramic) is the ability to cook with little to no oil, reducing the overall fat content of your meal.
    • Effortless Cleaning: These tawas prevent dough from sticking, making the flipping process stress-free and cleanup as simple as a gentle wipe with a soft sponge.
    • Precision and Consistency: Modern designs, often using an Aluminium base, heat up very quickly and provide a uniform temperature across the surface for consistent results.
    • Safety Standards: High-quality non-stick ranges, such as those from Prestige, utilize PFOA-free coatings to ensure no harmful chemicals are released during everyday cooking.

    Maintenance and Longevity Comparison

    To ensure your tawa remains “the best roti tawa in India,” proper care is essential based on its material.

    FeatureTraditional (Cast Iron/Clay)Non-Stick (Ceramic/PTFE)
    DurabilityExtremely High; lasts decades.Moderate; coating wears over time.
    CleaningRequires scrubbing; must be dried.Gentle wash only; no steel wool.
    SeasoningRequires regular oil seasoning.No seasoning required.
    Heat SensitivityCan handle very high heat.Can be damaged by overheating.

    Tips for the Perfect Roti

    Regardless of your choice, mastering the heat is the key to a perfect puff:

    1. Heat Mastery: Ensure the tawa is sufficiently hot before placing the dough. A cold tawa results in a hard, chewy roti.
    2. Even Flipping: Spend equal time on both sides. On a traditional tawa, use a cloth to press the edges for better fluffing.
    3. Storage: Once cooked, keep rotis in an insulated container to maintain softness through residual moisture.
  • Are Silicone Pans Better for Baking?

    Are Silicone Pans Better for Baking?

    Whether you are an avid baker or only break out the mixing bowls for special occasions, there is no shortage of pans to choose from. One of the most popular modern choices is Silicone, but is it truly superior to traditional metal, glass, or ceramic bakeware?

    Here is what cooking professionals have to say about the great bakeware debate, and when you should (or shouldn’t) use silicone.

    The Advantages of Silicone Bakeware

    According to experts like professional chef Christos Bisiotis and Rachel Breuhaus (CEO of The Silicone Kitchen), silicone brings several major benefits to the kitchen:

    • Exceptional Durability: Silicone is highly flexible and lightweight. Unlike glass and ceramic options that can easily shatter if dropped, silicone molds can endure heavy use and seamlessly transition from the freezer to the oven to the microwave without damage.
    • Free of Harmful Chemicals: Many traditional Non-stick surface pans contain Per- and polyfluoroalkyl substances (PFAS), which can release harmful fumes when scratched, warped, or exposed to high heat. Food-grade silicone is non-toxic, non-reactive, and completely stable up to 428°F (220°C).
    • No Greasing Required: Because silicone molds are naturally non-stick, you can generally skip adding extra butter or cooking oil to the pan.
    • Bake Without Breaking: The flexibility of the material makes it incredibly easy to pop out your cakes, cookies, and muffins without them crumbling or breaking apart.
    • Easy Cleaning and Storage: Heavy baking dishes are notoriously cumbersome to store. Silicone cups and pans take up a fraction of the cabinet space and are incredibly easy to clean, whether by hand with soap and water or in the dishwasher.

    Where Silicone Falls Short

    While silicone is an incredible tool for many recipes, it is not ideal for absolutely everything in the world of Baking.

    The primary drawback is heat conduction. Silicone simply does not conduct heat as efficiently as metal. As a result, your baked goods might not develop the same level of browning or crispiness. If you are aiming for crusty artisan breads or brownies with perfectly crispy edges, a traditional metal or ceramic pan is still your best bet.

  • Stovetop Kettles vs. Electric Kettles: Which Fits Your Morning Routine Better?

    Stovetop Kettles vs. Electric Kettles: Which Fits Your Morning Routine Better?

    There is something almost ceremonial about making your morning cup of tea or coffee. For some, the sound of bubbling water in a stovetop Kettle is a call to slow down and embrace ritual. For others, the swift click of an electric kettle defines efficiency and modern life.

    With Induction cooking transforming modern kitchens and stainless steel models gaining renewed relevance, the choice between stovetop and electric is no longer just about boiling water. It is about lifestyle, aesthetics, and how you want to start your day. Here is a breakdown of the pros and cons of each to help you decide.

    Speed & Energy Efficiency

    If your mornings are a race against the clock, speed is likely your top priority. Here is how the different kettles stack up when boiling one liter of water:

    • Electric Kettles (~2–3 minutes): These win for sheer efficiency. They heat water directly through a concealed plate or metal coil, minimizing energy loss.
    • Induction Hob Kettles (~3–4 minutes): By delivering magnetic energy directly into a compatible stainless steel kettle, induction hobs rival the pace of electric models.
    • Traditional Stovetop Kettles (~5–7 minutes): Boiling on a gas stove is the slowest method, as much of the heat escapes around the sides of the kettle.

    Safety & Smart Features

    • Electric: Engineered with safety at their core. Auto shut-off, boil-dry protection, and precise temperature settings are standard. Premium models even connect to apps for remote control, giving busy multitaskers peace of mind.
    • Stovetop: Relies on simpler cues, like the piercing, traditional whistle. While it requires more active attention to prevent boiling dry, pairing a stovetop kettle with an induction hob adds a layer of safety, as the hob automatically switches off when the cookware is removed.

    Material & Durability

    When it comes to material purity and longevity, Stainless steel is the gold standard for both types of kettles.

    • Stovetop Durability: A heavy-duty stovetop kettle can last decades with minimal maintenance, often becoming a family heirloom. They are also available in premium materials like copper (for exceptional conductivity) and colorful enamel.
    • Electric Construction: Electric kettles often combine stainless steel with heat-resistant plastics or glass. While sleek, these electronic components and mixed materials can wear out faster over time, especially in hard-water regions.

    Brewing Precision vs. Ritual

    • Electric (Precision & Control): For tea connoisseurs and pour-over coffee enthusiasts, precision is everything. Variable temperature controls let you set exact degrees (e.g., 80°C for delicate green teas or 96°C for bold pour-overs). Many also feature gooseneck spouts for slow, steady, barista-level pouring.
    • Stovetop (Ritual & Experience): Stovetop kettles invite you to engage all your senses. They do not give you a digital readout, but the gradual heating, the sound of the whistle, and the feel of a perfectly balanced pour can elevate a simple brew into a soulful, meditative act.

    The Final Verdict

    So, which kettle should you choose? It ultimately depends on the kind of mornings you wish to create:

    • Choose an electric kettle if speed, efficiency, and safety matter most.
    • Choose a stovetop kettle if you prefer unmatched durability, tradition, and a sense of sensory ritual.
    • Choose an induction hob kettle if you want the classic charm of a stovetop with the energy efficiency of modern technology.
  • OTG vs. Microwave: Which is Better for Indian Cooking?

    OTG vs. Microwave: Which is Better for Indian Cooking?

    Selecting between an OTG and a microwave depends heavily on your daily cooking habits, current requirements, and personal preferences. Because Indian cuisine unites a harmonious synchronization of complex culinary elements—from slow-cooked curries to crispy tikkas and soft rotis—choosing the right appliance is crucial.

    Here is an extensive comparison between these two appliances to determine which one fits your specific needs in an Indian kitchen.

    Understanding the Appliances

    Before deciding which is better for your home, it helps to understand how each appliance actually cooks your food.

    • What is an OTG? Standing for Oven Toaster Grill, this appliance essentially functions like an ordinary Toaster oven. It uses internal heating coils as its primary heat source to accurately bake, toast, and grill foods.
    • What is a Microwave? A Microwave oven operates through electromagnetic waves to provide an instant, highly efficient heating system. Advanced convection microwaves unite this rapid heating capability with additional heating elements, allowing users to also bake and roast.

    Performance for Indian Dishes

    Each appliance has distinct strengths and limitations when preparing traditional Indian food.

    When to Use an OTG: For baking cakes, homemade breads, and cookies, an OTG drastically outperforms a microwave. The even heat distribution leads to ideal textures and perfectly baked foods. In Indian cooking, an OTG is the ultimate tool for roasting and grilling tandoori dishes like kebabs and paneer tikka. Using an OTG equipped with a grill rack and skewers creates a perfect setting that produces an authentic charred texture and smoky flavor.

    When to Use a Microwave: If you frequently need to defrost frozen foods or reheat leftovers, a microwave is unmatched. It heats food quickly and keeps it moist while preventing it from drying out. However, while great for quick heating, traditional Indian recipes such as dal, curries, and sabzi require slow simmering, which standard microwaves cannot replicate effectively.

    Key Comparisons for Buyers

    If you are still on the fence, here is how the two appliances compare across daily usability metrics:

    • Energy Efficiency & Time: Microwaves cook food much faster by heating food directly, making them highly energy-efficient for quick tasks. OTGs take longer to heat up and cook since they rely on heating coils, which consumes more electricity over time.
    • Ease of Use: Microwaves offer effortless operation through preset functions, auto-cook menus, and digital controls. They are perfect for rushed individuals. OTGs require manual temperature control and longer preheating times, appealing more to creative, patient cooks.
    • Space & Portability: Because of their small size, microwaves easily fit into kitchens with limited countertop area. Modern OTGs provide different dimensions to suit various kitchens, though their volume usually exceeds that of a standard microwave.
    • Cost & Maintenance: Microwaves generally cost more upfront than OTGs. While OTGs are more affordable, they may require purchasing additional cookware like baking trays and grilling accessories. Maintenance-wise, microwaves are much easier to wipe clean, whereas OTGs require regular, detailed cleaning of their racks and heating elements to avoid food residue buildup.

    The Final Verdict

    Both appliances have their unique advantages. Your choice ultimately depends on your lifestyle:

    • If you love baking, grilling, and toasting, go for an OTG.
    • If you prioritize quick reheating, defrosting, and simple cooking, a Microwave is much more practical.
    • If you want a combination of both functionalities, a Convection Microwave is the perfect middle-ground solution.
  • Juicer vs. Blender: Which is Healthier?

    Juicer vs. Blender: Which is Healthier?

    When it comes to making healthy drinks at home, the two most popular appliances are juicers and blenders. At first glance, they might seem similar as they both turn fruits and vegetables into delicious, drinkable creations. However, the way they process ingredients and the nutritional benefits they provide are quite different.

    Whether you need a quick nutrient boost from a Juicer or a filling, fiber-rich smoothie from a Blender (device), here is everything you need to know to decide which is the better fit for your lifestyle.

    What Is a Blender?

    A blender processes the entire ingredient, including the pulp, skin, and seeds, blending everything together to create a thicker beverage.

    • The Result: A thick, creamy beverage like a smoothie or soup.
    • Nutrient Profile: Retains all the Dietary fiber and most nutrients, making drinks more filling and supportive of digestive health.
    • Common Types: Countertop blenders (versatile and powerful), immersion blenders (for hot pots and sauces), and personal blenders (for single-serve smoothies on the go).

    What Is a Juicer?

    A juicer, or juice extractor, separates the liquid from fruits or vegetables, leaving behind the pulp, seeds, and skin to be discarded.

    • The Result: A smooth, thin, pulp-free liquid.
    • Nutrient Profile: Extracts a highly concentrated dose of vitamins and minerals for a quick energy boost, but loses the digestive benefits of dietary fiber.
    • Common Types: Centrifugal juicers (fast-spinning blades that can generate heat) and masticating/cold-pressed juicers (slowly crushes produce to preserve enzymes and prevent oxidation).

    Which One is Healthier?

    Neither is objectively “healthier”—it simply depends on your personal wellness goals:

    • Choose a Blender if you want a balanced, fiber-rich option that provides sustained energy, keeps you full longer, and supports healthy digestion.
    • Choose a Juicer if you want a light, refreshing drink packed with easily digestible vitamins, which is especially popular for detoxes or juice fasting.

    The Ciarra Gadgets Cold Press Juicer

    If you decide that juicing is the right path for you, the Ciarra Gadgets High Yield Cold Press Juicer is designed to maximize both flavor and nutritional value.

    • Time-Saving Design: Features a massive 4.3-inch wide feed chute, allowing you to process whole fruits and hard vegetables (like apples or ginger) without the need for pre-cutting.
    • Incredible Yield: The slow masticating cold press technology extracts significantly more juice than competitors, leaving behind extremely dry pulp. It boasts a ≥ 75% yield for apples and ≥ 40% for carrots.
    • Quiet and Stable: Operates at a low noise level of 65–67 dB and features a non-slip base for safe, stable countertop use.
    • Smart Safety Features: Includes an automatic safety lock that stops the machine if the lid is opened, along with overheat and overload protection.
    • Versatility: Beyond standard green juices, the slow-crush mechanism is perfect for making fresh, homemade nut milks.
  • Colander vs. Strainer: Differences Between the Kitchen Tools

    Colander vs. Strainer: Differences Between the Kitchen Tools

    Home cooks use colanders and strainers to easily separate liquids from solids. While they may seem interchangeable at first glance, understanding the specific differences between these tools and their optimal usage will elevate your efficiency and precision in the kitchen.

    What Is a Colander?

    A Colander is a silicone or metal bowl with drainage holes that chefs and home cooks use to drain liquids from solids, typically to rinse vegetables or drain pasta or ground meats. The filtration level can range from large holes to small holes to stainless-steel coarse-mesh netting (though netting is more common in strainers than colanders).

    Colanders are typically as large as a standard cooking bowl to accommodate family-sized portions of produce, pasta, or meat. Many heavy-duty colanders have handles on either side of the bowl and a sturdy base to allow them to stand on their own. This base also allows them to serve as a decorative storage space for washed produce on a kitchen counter. There are also collapsible colander models available for easy, space-saving storage.

    What Is a Strainer?

    A strainer is a wire-mesh silicone or metal kitchen Sieve that chefs and home cooks use to separate liquids from fine solids in cooking. They are often used in situations where small solids or pieces of sediment (like tea leaves or tiny fruit seeds) require much finer filtration.

    The filtration level can range from fine-mesh strainers to options with slightly larger holes. Strainers come in many different sizes, from the size of a small teacup to a large-size cooking bowl. Many feature a long handle or front hooks that allow them to rest securely over the top of a bowl.

    In both appearance and uses, strainers significantly overlap with two other specialized kitchen gadgets: sifters (which you can use for sifting flour, powdered sugar, or other powdered solids in baking) and a Chinois, a conical sieve used for making smooth custards and straining soups and sauces.

    Colanders vs. Strainers: Key Differences

    While colanders and strainers are pieces of cookware with overlapping uses as kitchen utensils, there are a few technical differences between them:

    • Size and Shape: Colanders are typically much larger than strainers and feature a base to stand independently in a sink. Strainers vary heavily in size and usually have a single long handle (or two small hooks) without a flat base.
    • Filtration Level: Colanders usually have bigger holes throughout, providing a moderate level of filtration (though some modern colanders have borrowed the stainless steel mesh of strainers). Strainers, on the other hand, are nearly always meshed to reach a high level of fine filtration.
    • Primary Uses: Since colanders have moderate filtration, they can only separate liquid from large pieces of food, like rinsing vegetables or draining boiled pasta. Alternatively, strainers have fine filtration and can provide a wider range of straining services, from draining pasta to straining out fine pieces of sediment like fruit pulp, purées, or loose tea leaves.
  • Saucepan vs. Pot: What’s the Difference?

    Saucepan vs. Pot: What’s the Difference?

    By All-Clad Editorial Team | Published: May 16, 2025

    Saucepans and stockpots are essential kitchen pieces, but knowing exactly when to use each can significantly elevate your cooking results. Explore the distinct differences between saucepans and pots with our expert advice, and learn how to pick the right Cookware for your culinary creations.

    What Is a Saucepan?

    Distinct in design, a Saucepan features tall, straight sides and a single long handle, making it perfect for creating everything from delicate sauces to deglazing or heating liquids. The smaller surface area ensures superior heat retention while minimizing rapid evaporation.

    • Sizes and Capacity: Stainless steel saucepans typically range from 1 to 4 quarts, offering the right size for focused cooking tasks.
    • Design Features: The flat bottom and straight edges promote incredibly even heating, while a tight-fitting lid easily locks in moisture and flavor during cooking.
    • Best Culinary Uses: From reducing wine sauces to simmering grains, the saucepan excels at liquid-based cooking methods. The carefully engineered design prevents boil-overs and allows for precise temperature control.

    Features and Uses of Stockpots

    A Stock pot brings exceptional performance to your kitchen with deep, straight walls and a wide base. This design maintains consistent temperatures for slow-simmering stews and large-batch cooking.

    • Sizes and Capacity: Master batch cooking with sizes ranging heavily from 4 to 12 quarts.
    • Design Features: Chef-inspired designs include two sturdy handles on either side for confident lifting, while the premium construction ensures even heat distribution from the base all the way to the rim.
    • Best Culinary Uses: The tall edges prevent splashing during heavy boiling. Whether you’re preparing a hearty soup, boiling pasta, or blanching fresh vegetables, these versatile pots deliver exceptional performance.

    How to Choose the Right Cookware

    When preparing your favorite recipes, matching the right cookware to your dish makes all the difference in the world.

    • When to use a Saucepan: For small batches and sauce-based dishes, reach for a saucepan. The precise heat control, tall edges, and narrower surface area help reduce liquids perfectly while preventing hot splatter.
    • When to use a Stockpot: Choose a pot when cooking larger portions or dishes requiring substantially more liquid. The wider base and generous capacity provide ample room for ingredients to move freely. Consider your serving size: a 3-quart saucepan works beautifully for family sides, while an 8-quart pot handles large dinner party portions with ease.

    Caring for Your Cookware

    Maintain your cookware’s brilliant performance by letting it cool completely before cleaning. Hand wash your pots and pans with warm, soapy water and a soft cloth—this gentle approach preserves the Stainless steel finish for a lifetime.

    • Protect the Surface: During cooking, always use wooden or Silicone utensils to protect the cooking surface from unwanted scratches.
    • Prevent Pitting: When cooking with salt, make sure to add it only after liquids have reached a rolling boil to prevent pitting the metal.
    • Control the Heat: Keep heat settings at medium or lower. Multi-layered bonded construction ensures superior heat retention without ever requiring high, scorching temperatures. Match your burner size to your pan’s base for optimal heat distribution.
    • Smart Storage: Store your saucepans and pots with protective cloth layers between them to avoid scratches in your cabinets.

    Elevate Your Cooking

    Transform your kitchen into a professional cooking space. The right cookware becomes your trusted partner in creating memorable meals, whether you’re reducing a delicate sauce or simmering a hearty stew for the whole family. With the right pieces in your kitchen arsenal, you will cook with complete confidence and create dishes that delight.