Category: Kitchen

  • Olive Oil Sprayer vs. Pouring: Which Method Offers Better Control in 2026?

    Olive Oil Sprayer vs. Pouring: Which Method Offers Better Control in 2026?

    Olive oil is celebrated as one of the healthiest fats in a modern diet, but in 2026, the focus has shifted from what fat we use to how we apply it. Whether you are drizzling directly from a glass bottle or using a specialized kitchen oil spray bottle, your choice impacts calorie density, flavor profile, and even the longevity of your cookware.

    As we embrace precision cooking—particularly with the surge in air fryer usage—the debate between spraying vs. pouring has become a central topic for health-conscious home cooks.

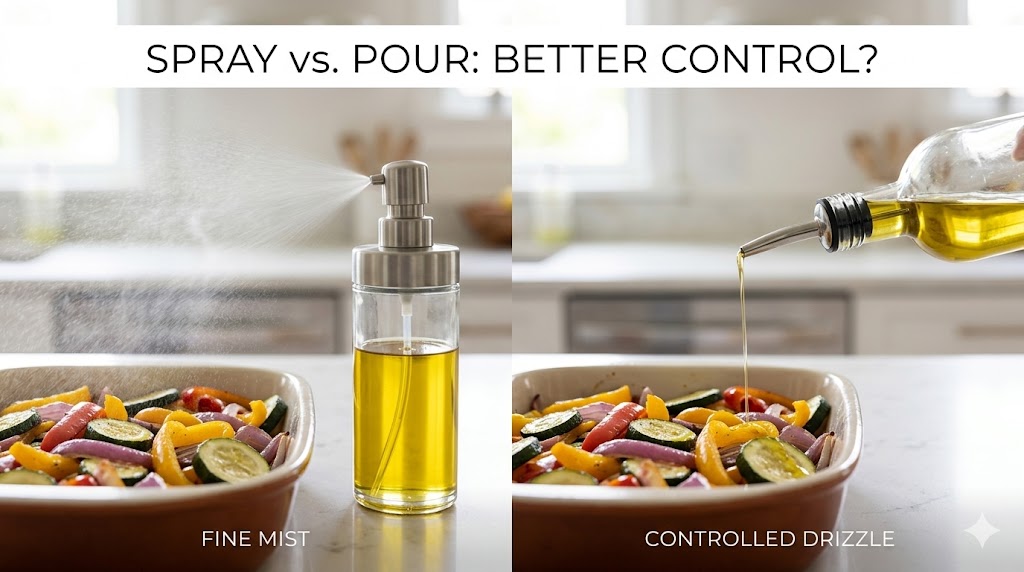
    1. The Health Factor: Calorie Precision

    The primary advantage of a sprayer is the elimination of “hidden calories.” When pouring, a “quick drizzle” often accidentally turns into 2–3 tablespoons ($240$–$360$ calories).

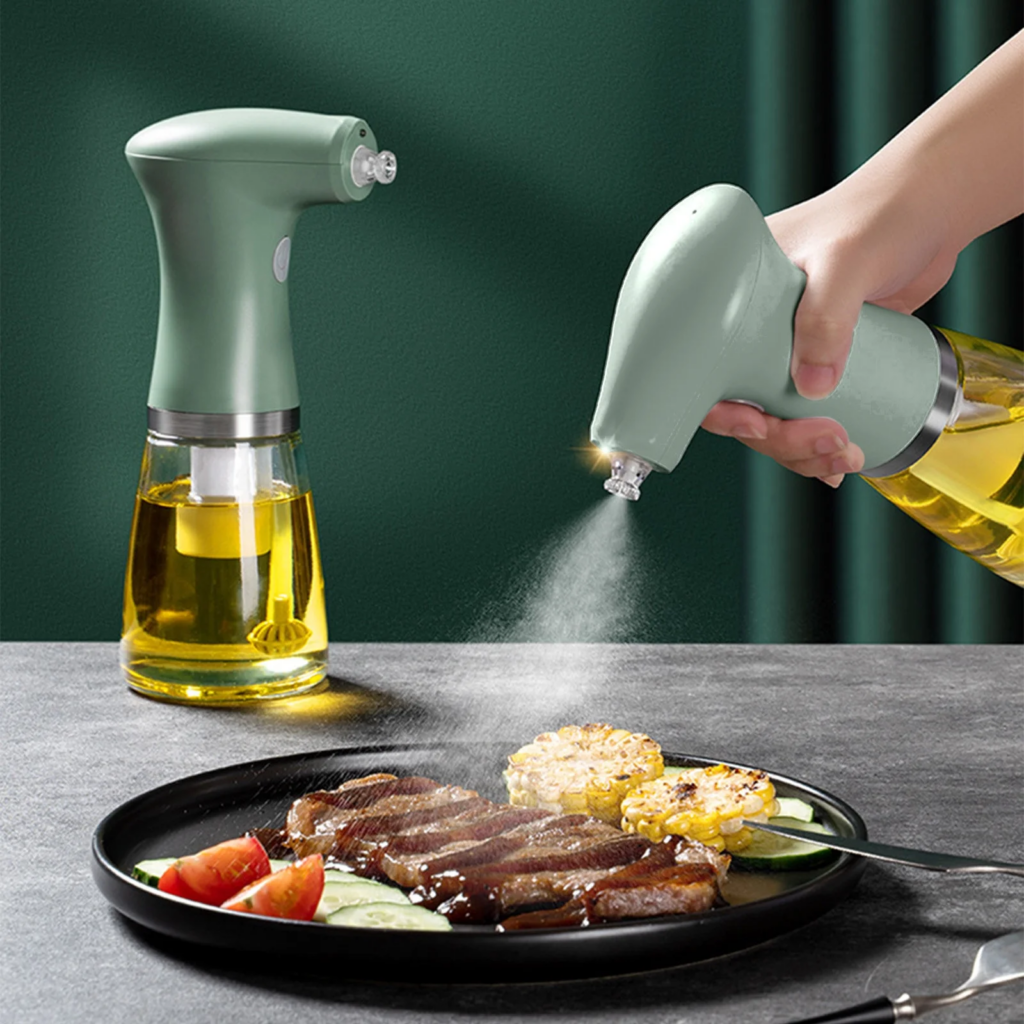
    • The Spray Advantage: A standard Yarramate Oil Sprayer releases approximately 0.2–0.3 grams of oil per pump. This allows you to coat an entire tray of vegetables with less than $1$ gram of oil ($9$ calories), whereas pouring often results in uneven pooling and excess fat consumption.
    • Mouthfeel and Satiety: Research from the National Institutes of Health (NIH) suggests that an even distribution of oil (mist) can provide the same sensory “richness” as a heavy pour but with significantly lower lipid intake.

    2. Precision in the Kitchen: Texture and Results

    Precision isn’t just about health; it’s about the science of the “crunch.”

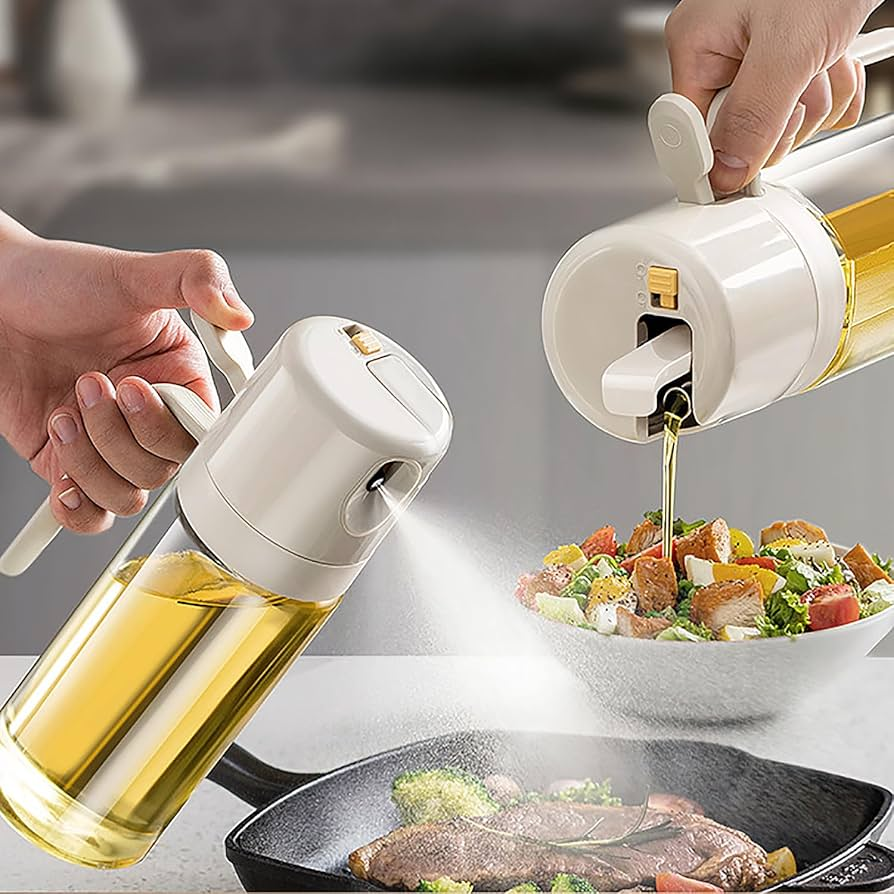
    • Air Frying Performance: For those using an air fryer oil spray bottle, the mist is essential. A fine mist allows the Maillard reaction to occur evenly across the surface of the food, resulting in a lighter, crispier texture without the greasiness associated with pouring.
    • The “Pour” Exception: Pouring remains superior for tasks that require deep saturation, such as marinating meats or creating a dipping bowl for artisanal bread. As the FDA notes, oil also acts as a preservative and heat conductor; in slow-roasting or braising, a heavier pour may be necessary for the recipe’s structural integrity.

    3. Economic Impact: Stretching Your Pantry

    In 2026, with the rising costs of premium cold-pressed olive oils, minimizing waste is a financial priority.

    1. Reduced Overpouring: A sprayer ensures every drop is utilized on the food, not left at the bottom of the pan.
    2. Oxidation Protection: Modern Anti-UV Dark Glass Sprayers protect sensitive oils from light, which the USDA FoodData Central identifies as a primary cause of rancidity.
    3. Cleanup Efficiency: Less oil in the pan means less detergent and water needed for cleanup, supporting sustainable kitchen practices.

    Professional Tips for Oil Sprayer Maintenance

    To ensure your sprayer performs optimally through 2026, follow these expert guidelines:

    • Temperature Matters: Olive oil can thicken in cold environments. Store your sprayer at room temperature ($20^\circ\text{C}$–$25^\circ\text{C}$) to ensure a fine mist rather than a stream.
    • Avoid Clogging: Use “filtered” oils. Extra virgin olive oil with high sediment levels can clog fine nozzles.
    • Safety First: When using sprayers near open flames (like a gas range), the Mayo Clinic reminds cooks to spray the food before placing it near the heat source to avoid flare-ups.

    Conclusion

    The olive oil sprayer is the clear winner for daily health management, portion control, and achieving “air-fried” perfection. While pouring still has a place in high-volume marinating and traditional dressings, the kitchen oil spray bottle has become an indispensable tool for the 2026 healthy kitchen. By switching to a sprayer, you essentially modernize your cooking process—saving calories, money, and time without sacrificing the rich flavor of your favorite olive oils.

  • The Great Debate: Enameled Cast Iron vs. Traditional Cast Iron

    The Great Debate: Enameled Cast Iron vs. Traditional Cast Iron

    Deciding between traditional and enameled cast iron is a common dilemma for modern cooks. Both are induction-ready, induction-compatible kitchen staples known for their longevity and superior heat retention. However, the choice between them often comes down to your specific cooking style—whether you prefer high-heat searing and rustic durability or low-and-slow simmering with effortless maintenance.

    In 2026, as home cooks prioritize non-toxic, chemical-free cookware, understanding the structural differences between these two materials is essential for building a healthy, high-performance kitchen.

    1. Traditional (Bare) Cast Iron: The Rustic Workhorse

    Traditional cast iron is an alloy typically composed of 98% iron and 2% carbon. It is uncoated and requires “seasoning”—a process of baking oil into the metal to create a natural, non-stick patina.

    • Durability: Virtually indestructible. It can be used over open flames, grills, or campfires.
    • High Heat: Unmatched for searing steaks or baking crusty cornbread at extreme temperatures.
    • Health Fact: Cooking in bare cast iron can slightly increase the iron content of your food, which can be beneficial for those managing iron-deficiency anemia (as noted by the NIH).

    2. Enameled Cast Iron: The Modern Classic

    Enameled cast iron is essentially traditional cast iron coated with a layer of vitreous enamel (glass). This creates a non-reactive, smooth surface that eliminates the need for seasoning.

    • Non-Reactive: Unlike bare iron, enamel does not react with acidic foods like tomatoes, wine, or lemons. According to the FDA, non-reactive surfaces are ideal for long-simmering sauces to ensure flavor purity.
    • Low Maintenance: Rust-resistant and easy to clean with mild soap.
    • Slow Cooking: Superior for braising stews and casseroles in the oven at low-to-medium heat.

    Side-by-Side Comparison

    ParameterTraditional Cast IronEnameled Cast Iron
    MaintenanceHigh (Requires seasoning)Low (No seasoning needed)
    DurabilityHigh (Lifelong)Medium (Enamel can chip)
    Acidic FoodsNot recommendedPerfectly Safe
    Max HeatExtremely HighLow to Medium
    Best ForSearing, Frying, GrillingStews, Sauces, Braising

    Professional Tips for Longevity

    To keep your cast iron in peak condition through 2026 and beyond, follow these expert guidelines:

    1. Avoid Thermal Shock: Never plunge a hot pan into cold water. This can cause bare iron to crack and enamel to “craze” or chip.
    2. Utensil Choice: While bare iron can handle metal spatulas, the American Academy of Nutrition and Dietetics suggests using wooden or silicone tools on enameled surfaces to prevent scratching.
    3. Rust Prevention: For bare cast iron, always dry immediately on a warm stovetop burner after washing. Moisture is the primary enemy of uncoated iron ore.
    4. Safety: Because cast iron retains heat for a long time, the Mayo Clinic reminds cooks to always use oven mitts, as the handles become just as hot as the cooking surface.

    Conclusion

    The “better” option depends entirely on your menu. Traditional cast iron is a lifelong investment for those who love high-heat techniques and don’t mind a little maintenance. Enameled cast iron is the ultimate choice for the modern cook who values aesthetic variety and the ability to cook acidic sauces without worry. If your budget allows, owning both is the most versatile strategy: use bare iron for your burgers and cornbread, and save the enamel for your slow-cooked Sunday stews.

  • A Definitive Countertop Oven Comparison: Toaster Oven vs. Air Fryer vs. Convection Oven

    A Definitive Countertop Oven Comparison: Toaster Oven vs. Air Fryer vs. Convection Oven

    Selecting the perfect countertop oven is about balancing speed, space, and the quality of your favorite snacks. As summer approaches, many homeowners seek efficient solutions that cook delicious meals without heating up the entire kitchen. Whether you are looking for radiant precision or convection speed, understanding how these small appliances interact with your food—and your energy bill—is essential for the modern kitchen.

    Meet the Contenders: Which Technology Wins?

    Choosing between these three powerhouses depends on your specific culinary needs and the “footprint” you can afford on your counter.

    • Toaster Ovens: These are compact, countertop staples that bake, broil, and roast. Modern units, particularly those using Graphite heating technology, can eliminate preheating entirely, reaching target temperatures in a fraction of a second.
    • Convection Ovens: These act like miniature versions of a standard range, using fans to circulate hot air. While they provide exceptionally even heat, they tend to be bulkier and require more preheating time (typically 5–10 minutes).
    • Air Fryers: A modern subset of convection cooking, often referred to as “pod-style” cookers. They use high-velocity dry heat to mimic deep-frying. While they are masters of crispiness, their upright basket design makes them less versatile for flat recipes like toast or nachos.

    Speed, Capacity, and Energy Efficiency

    In the race for efficiency, the Radiant-Heat Toaster Oven leads the pack. Because units like the HeatMate do not require preheating, they save both time and electricity. According to the U.S. Department of Energy, small countertop appliances use significantly less energy than a full-sized oven, making them the superior choice for staying cool during summer months.

    When it comes to capacity, toaster ovens provide the largest cooking chamber relative to their external size (roughly 0.3 to 1 cubic foot). Convection ovens, while powerful, often lose internal space to accommodate fans and vents. Air fryers are the most compact but have the smallest usable cooking area, usually capped at around 0.6 cubic feet.

    From a health perspective, the American Heart Association notes that air fryers and convection ovens can reduce dietary fat intake by up to 80% compared to traditional frying. However, when using high-heat settings, the FDA recommends cooking starchy foods to a golden yellow rather than dark brown to minimize the formation of acrylamide.

    Conclusion

    The best appliance for your home depends on your primary cooking style. If you frequently cook packaged fried foods like wings or fries, the Air Fryer is your best bet for crispiness. If you are a serious baker who needs even air circulation for delicate recipes, a Convection Oven is worth the counter space. However, for the majority of home cooks who want an all-around efficient, “instant-on” solution that can bake, toast, and roast without the bulk, the Modern Toaster Oven remains the gold standard for countertop cooking.

  • Breaking Myths About Cast Iron Cookware: Facts Every Cook Should Know

    Breaking Myths About Cast Iron Cookware: Facts Every Cook Should Know

    Cast iron cookware has been a kitchen staple for centuries, yet it remains one of the most misunderstood tools in the culinary world. From fears of rust to confusion over “seasoning,” myths often prevent home cooks from investing in what is arguably the most durable material available. In reality, cast iron is a nutritional and functional powerhouse that actually improves with age.

    Whether you are using traditional pre-seasoned pans or modern enamel-coated cast iron, understanding the science behind the metal will transform your cooking experience.

    Debunking Common Cast Iron Myths

    Myth #1: Cast Iron is High-Maintenance and Hard to Clean

    The Truth: While it requires a different approach than stainless steel, it isn’t “difficult.”

    • Enamel-Coated: Requires zero seasoning and can be washed with standard mild soap.
    • Traditional: Simply needs to be dried immediately after washing and rubbed with a light coat of oil. According to the USDA FoodData Central, maintaining the integrity of the cooking surface prevents oxidation and ensures a natural non-stick finish.

    Myth #2: You Can’t Use Soap on Cast Iron

    The Truth: This is a carryover from the days when soap contained harsh lye. Modern mild dish soaps will not strip away a well-bonded layer of seasoning. However, the FDA guidelines on food contact surfaces suggest avoiding abrasive scourers that can physically scratch the iron or enamel.

    Myth #3: Cast Iron Reacts Dangerously with Acidic Foods

    The Truth: * Enamel-Coated: Completely non-reactive and safe for simmering tomato sauces or citrus-heavy stews for hours.

    • Pre-Seasoned: Can leach a metallic taste if acidic foods are cooked for long periods. However, a quick sauté of tomatoes in a well-seasoned pan is perfectly safe and can even slightly increase the iron content of your food (NIH), which is beneficial for those managing iron-deficiency anemia.

    The Science of Heat Retention

    A common complaint is that cast iron takes too long to heat up. While it has lower thermal conductivity than aluminum, it possesses superior heat capacity.

    • Steady Cooking: Once hot, cast iron stays hot. This prevents temperature drops when you add a cold steak or a large batch of vegetables to the pan.
    • Even Distribution: It radiates heat effectively, making it ideal for baking bread or slow-cooking stews. The American Heart Association notes that consistent heat can help in cooking proteins more evenly without the need for excessive added fats.

    Longevity and Safety in 2026

    In an era of “throwaway” non-stick pans coated with PFOAs or PFAs, cast iron is the ultimate sustainable choice.

    1. Chemical-Free: Naturally seasoned iron provides a slick surface without synthetic coatings.
    2. Indestructible: Unlike Teflon, which can peel and release fumes at high temperatures, cast iron can be stripped and re-seasoned even if it rusts.
    3. Rust Prevention: Rust only forms if the pan is left wet. To protect your investment, always dry your pan on a warm stovetop burner after washing. For more on safe metal usage in the kitchen, check the CDC’s information on environmental health.
  • Stand Mixer vs. Hand Mixer: Which Should You Choose?

    Stand Mixer vs. Hand Mixer: Which Should You Choose?

    Whether you are a keen amateur chef preparing a three-course feast or an occasional baker whipping up a quick batch of cupcakes, a good mixer is an essential piece of equipment for your kitchen toolkit.

    Both appliances will make light work of mixing dough, whipping cream, and whisking up fluffy meringues, but figuring out whether you need a heavy-duty stand mixer, a compact hand mixer, or both can be confusing.

    Here is our practical guide to the differences, pros, cons, and costs to help you choose the best food mixer for your unique cooking style.

    What is the Core Difference?

    • The Hand Mixer: As the name implies, this is a handheld electric mixer that you hold directly over a bowl. They are highly portable, easy to use, and perfect for quickly tackling everyday tasks.
    • The Stand Mixer: A heavy-duty electric mixer attached to a fixed stand that sits permanently on your worktop. They come with dedicated mixing bowls and various attachments, operating completely hands-free.

    Why Should I Choose a Stand Mixer?

    Stand mixers are the heavyweights of the kitchen. They are robust, powerful, and ideal for tackling large batches of ingredients and stiffer mixtures like bread dough.

    “For stand mixers, weight and sturdiness are key,” explains Steven Carter-Bailey, food expert at ProCook. “Whilst a heavier appliance may seem less appealing, the weight helps it stay stable during operation.”

    Stand mixers usually feature powerful motors (aim for at least 600W) and up to 10 speed settings. They also boast large capacities, typically ranging from 4 to 6.9 litres. Because they hold the bowl firmly in place and run on their own, they take the physical strain out of mixing and allow you to multitask. Furthermore, brands like KitchenAid offer power hubs that transform the mixer into a multi-use appliance capable of grinding meat, making pasta, or churning ice cream.

    Stand Mixer Pros & Cons

    Pros:

    • Solid, stable, and incredibly robust.
    • Powerful motors capable of kneading heavy dough.
    • Hands-free operation allows for kitchen multitasking.
    • Vast array of attachments for broad food prep tasks.
    • Beautiful, iconic designs that act as a kitchen statement piece.

    Cons:

    • Very heavy and difficult to move or store.
    • Significant financial investment (ranging from £75 up to £1,000).
    • Can be fiddly to clean, and not all parts are dishwasher safe.
    • Overkill for very quick, small mixing tasks.

    Why Should I Choose a Hand Mixer?

    Hand mixers are the ultimate champions of quick, convenient cooking. They usually feature five to nine speeds, giving you plenty of power to whip up batters or stiff peaks without the setup time of a stand mixer.

    One of the biggest advantages is their size. Hand mixers take up virtually no space and can easily be tucked away in a drawer, making them ideal for compact kitchens. Furthermore, they allow you to mix directly inside any container—be it a saucepan on the stove or a standard mixing bowl—which cuts down significantly on washing up.

    “Because these appliances are smaller, they require more attention as they can sometimes vibrate or move around on the counter,” notes Isabella Forgione, small appliances expert at AO.com. Because you have to hold them, they can tire out your arms during prolonged use, making them less suitable for dense bread doughs.

    Hand Mixer Pros & Cons

    Pros:

    • Lightweight, highly portable, and compact to store.
    • Perfect for mixing small batches and quick tasks.
    • Highly affordable (ranging from £10 to £180).
    • Very easy to clean with dishwasher-safe beaters.
    • Cordless models are available for ultimate kitchen flexibility.

    Cons:

    • Significantly less powerful than stand mixers.
    • Tiring to hold for long periods of time.
    • Fewer attachments and speed settings.
    • Only suitable for smaller, lighter batches.

    Head-to-Head Comparison

    FeatureStand MixerHand Mixer
    Best ForLarge batches, bread dough, hands-free baking.Small batches, whipped cream, quick batters.
    PowerHigh (Often 600W+)Moderate
    Storage SpaceHigh (Requires dedicated counter space)Low (Fits in a drawer)
    Price Range£75 – £1,000+£10 – £180
    OperationHands-freeManual holding required

    The Final Verdict: Which Should You Buy?

    Choose a Hand Mixer if: You bake small batches, have limited kitchen space, are on a tighter budget, and do not plan on regularly kneading heavy bread dough. It is perfect for the occasional baker who wants a quick, easy cleanup.

    Choose a Stand Mixer if: You regularly cook for a larger crowd, bake frequently, or love making homemade bread. The hands-free power and vast versatility make it a true kitchen workhorse for the serious home chef.

    The Ultimate Setup: In an ideal world, if space and budget allow, having both types of mixers offers maximum kitchen flexibility. You can grab the hand mixer for a quick whipped cream topping, and rely on the stand mixer for your heavy-duty holiday baking!

  • French Press vs. Coffee Maker: Which Is the Right Choice for Me?

    French Press vs. Coffee Maker: Which Is the Right Choice for Me?

    When it comes to brewing the perfect cup of coffee, there is no single right answer. It all comes down to your personal preference and your daily lifestyle.

    If you have a busy morning routine and need your espresso to fit in seamlessly with minimal effort, a coffee machine will be an ideal addition to your kitchen. However, if you have the time to enjoy your coffee at a slower pace and would like to put your barista skills to good use, a traditional French press can provide a much more enriching experience.

    Here is a comprehensive look at the cost, convenience, and flavour profiles of both brewing methods to help you find the perfect match for your mornings.

    Understanding the Brewing Methods

    The Coffee MachineCoffee machines are electric appliances that create coffee via a pod system or by grinding beans in a built-in grinder. In both cases, high-pressure steam and hot water are forced through the ground coffee to drip into your cup. You can choose from different pods to create cappuccinos, espressos, and lattes, giving you a massive variety of drinks at the touch of a button.

    The French Press When using a French press (or cafetière), you grind the coffee beans just before you need them to ensure the freshest flavour. You add the coarse grounds to the pot, followed by nearly boiling water, and let it steep. After about four minutes, you push the metal plunger to the bottom of the pot to separate the grounds, and your coffee is ready to pour.

    The French Press: Pros, Cons, and Value

    A French press typically creates a brew that is much richer and bolder in flavour. It also allows for total versatility, as you can adjust the strength by changing the amount of coffee grounds or tweaking the steeping time.

    Pros:

    • Eco-Friendly and Affordable: With glass or stainless steel designs starting at under £22, it is highly accessible. It also creates zero waste, unlike plastic pod-based machines.
    • Batch Brewing: A standard French press can make around four drinks at once, making it ideal if you are serving multiple people.
    • Space-Saving: It is compact, easy to clean, and takes up minimal cupboard space.

    Cons:

    • Time-Consuming: It requires a more hands-on approach and takes longer to create your morning brew.
    • Sediment: Because it uses a metal mesh filter rather than paper, some fine sediment may slip through into your cup, which deters some coffee lovers.

    The Coffee Machine: Pros, Cons, and Value

    The best coffee machines are the ideal choice for those with busy lifestyles. Convenient and easy to use, the touch of a button is all that is needed to brew the perfect cup while you get on with your day.

    Pros:

    • Speed and Convenience: Delivers your favourite hot drink in seconds with virtually no physical effort.
    • Consistency: Automatic machines deliver the exact same high-quality shot of coffee time after time.
    • Variety: Easily switch between different types of coffee beverages depending on your mood.

    Cons:

    • Higher Costs: Coffee machines command a higher price point, with basic models starting around £100 and premium models exceeding £300. You also have the recurring expense of buying specific capsules or filters.
    • Environmental Impact: Pod-based machines create a significant amount of waste after every single drink.
    • Bulky Design: Many automatic espresso machines feature large footprints that take up valuable kitchen counter space.

    Expert Tips for the Perfect Brew

    Whichever method you choose, technique is everything. Here is what the professionals recommend:

    Mastering the French Press David Cutler, head of training at Lavazza, recommends sticking to a 1:16 coffee-to-water ratio. This works out to 15 grams of medium-to-coarse coffee per 250ml mug, brewed for exactly four minutes. Anything finer can result in over-extraction and a muddy cup.

    Additionally, Ben Fishlock, barista at SOroast, warns against using fully boiling water. “You will scorch the flavour out of your coffee. Stick to about 91 degrees, right as the kettle starts making a bit of noise.”

    Mastering the Coffee Machine If you are using a manual or semi-automatic machine, precision is key. Espresso should typically brew somewhere around the 20 to 30-second mark. If it runs too fast, you need to grind your beans finer; if it is too slow, adjust them coarser.

    The Final Verdict

    If you are a minimalist who prefers simplicity, has a tighter budget, and enjoys taking the time to refine your taste profile, a French press is the perfect solution for your coffee cravings.

    But for those with a fast-paced life in a busy household, where you want café-style variety (like lattes and flat whites) with absolute minimal effort, investing in an automatic coffee machine will tick every single box.

    Also Read : Slow Cooker vs. Pressure Cooker: Which Should You Buy?

  • Slow Cooker vs. Pressure Cooker: Which Should You Buy?

    Slow Cooker vs. Pressure Cooker: Which Should You Buy?

    Soups, stews, curries, and melt-in-the-mouth meats: both pressure cookers and slow cookers handle these cozy classics brilliantly. However, the way each appliance goes about cooking them is vastly different, meaning their benefits and drawbacks will cater to entirely different lifestyles.

    If you are wondering whether to add a slow cooker or a pressure cooker to your kitchen counter, here is a comprehensive breakdown of how these clever gadgets work, what they offer, and which one truly suits your daily routine.

    The Main Differences: Time vs. Planning

    The biggest difference between a slow cooker and a pressure cooker comes down to speed.

    While slow cookers use a gentle, low heat to simmer ingredients to perfection over several hours, pressure cookers seal the interior tightly under high pressure, trapping steam to whip up dinner incredibly rapidly.

    “The difference between the two types of cooker is mainly the time you have to spare,” explains Kathryn Farrell, buyer for Lakeland. “A pressure cooker can be up to 90% faster than cooking with a pan on the hob.”

    • The Slow Cooker Lifestyle: Requires you to plan your dishes in advance. You must be organized enough to prep your ingredients in the morning, but it provides the ultimate convenience of arriving home from work to a hot meal that is completely ready to eat.
    • The Pressure Cooker Lifestyle: Requires very little planning. It offers the convenience of deciding what you want for dinner at 5:00 PM and having it fully cooked, tender, and on the table by 5:45 PM.

    Slow Cooker Pros and Cons

    Pros:

    • True Hands-Free Cooking: Slow cookers are the masters of the ‘set and forget’ method. Pop in your ingredients, set the heat, and walk away for 8 hours.
    • Enhanced Flavors: As ingredients heat for hours, there is ample time for rich flavors to mingle, producing incredibly tasty results.
    • Energy Efficient: They use very low wattage, making them highly economical to run all day.

    Cons:

    • Requires Advance Planning: You have to start dinner right after breakfast.
    • Advance Prep Work: If your recipe includes meat or onions, you usually have to brown them in a separate pan on the hob before adding them to the slow cooker (unless your model features a sauté function).
    • Mushy Textures: Certain vegetables can become overly soft and mushy if left in the pot for too long.

    Pressure Cooker Pros and Cons

    Pros:

    • Lightning Fast: They produce tender meat, perfectly cooked pulses, and hearty stews in a fraction of the time.
    • Locks in Nutrients: “The shorter cooking time and sealed environment help to preserve vitamins and minerals that can be lost through prolonged cooking,” reveals Sarah Farquharson from Instant Pot.
    • Versatile: Most modern electric pressure cookers (often called multicookers) can also sauté, steam, and even make yogurt.

    Cons:

    • Steeper Learning Curve: Pressure cookers are less ‘set and forget.’ They require you to understand pressure release valves and specific liquid ratios.
    • More Expensive: While a basic slow cooker is very cheap, a quality electric pressure cooker is a larger upfront investment.

    Head-to-Head Comparison

    FeatureSlow CookerPressure Cooker
    Cooking SpeedVery Slow (4 to 8 hours)Very Fast (15 to 45 minutes)
    Best ForLarge families, batch cooking, stews.Busy professionals, last-minute meals, risotto.
    Hands-On TimeHigh at the start (morning prep).Medium (requires some monitoring).
    Price Range£30 – £200£60 – £200+

    Which is Best For You?

    Buy a Pressure Cooker if: You have a busy lifestyle with zero time for morning food prep before dashing out the door. If you want the ability to make hearty, comforting meals from scratch after you get home from work, a pressure cooker is your best friend.

    Buy a Slow Cooker if: You are cooking for a large family and everyone eats at different times. Slow cookers are ideal for batch cooking on weekends and keeping food warm safely for hours on end.

    The Ultimate Compromise: The Multicooker

    What if you cannot decide? If you want the convenience of arriving home to a slow-cooked stew on a Tuesday, but need to pressure-cook a fast batch of rice on a Wednesday, invest in a hybrid multicooker (like the Ninja Foodi or Instant Pot).

    A multicooker saves on both space and cost, offering a massive range of techniques in a single, versatile appliance, giving you the luxury of both time-saving speed and slow-cooked comfort!

  • Blenders vs. Food Processors: Which is Right for Your Kitchen?

    Blenders vs. Food Processors: Which is Right for Your Kitchen?

    If you enjoy getting creative in the kitchen, you might be looking for a new appliance to take your culinary flair to the next level. However, choosing between a food processor and a blender can be rather confusing, with many people mistakenly believing that they offer the exact same qualities and functions.

    To help you make the right investment, we consulted kitchen appliance experts to expose the strengths and weaknesses of each gadget. Whether you are hunting for the best blender for morning smoothies or a processor to make weekly meal prep a breeze, here is everything you need to know.

    What Can a Blender Do That a Food Processor Can’t?

    Thanks to the design of its tall jug and upward-facing blades, a blender can easily transform ingredients into smoothies, drinks, dips, soups, and sauces.

    “Blenders, in general, can produce a smoother consistency more quickly for low viscosity liquids,” explains Stephen Catherall, UK sales manager at Magimix. “This is great for things like smoothies with harder and tougher ingredients and silky-smooth soups.”

    Furthermore, many high-powered blenders can effortlessly crush ice, making them the perfect tool for finishing off summer cocktails or frozen drinks.

    What Can a Food Processor Do That a Blender Can’t?

    Due to the rounder, wider bowl and S-shaped blade, a food processor is built to tackle ingredients in a completely different way.

    “Any food that you would consider cutting with a knife on a chopping board will produce better results in a food processor than in a blender,” says Stephen. “Think chopping herbs, onions, carrots, garlic, celery, or nuts.” Even meat can be chopped easily in a food processor as it doesn’t get stuck under the blades.

    Food processors excel at:

    • Grating & Slicing: Perfect for shredding cheese, carrots, beetroot, or slicing courgettes into ribbons for quick, tasty salads.
    • Kneading Dough: Food processors knead dough successfully, whereas blender blades spin far too fast for effective dough kneading.
    • Dicing & Whisking: Many processors come with specialized attachments to help you achieve professional-level food prep.

    Pros and Cons: The Head-to-Head Comparison

    The Food Processor

    “Food processors offer fantastic multifunctionality in the kitchen and can help you produce a wide variety of dishes,” explains Steven Carter-Bailey, food expert at ProCook. “They are better at producing coarse or fine consistencies, as well as everything in between—you have more control than with a blender.”

    • Pros: Highly versatile, great for solid foods, multiple attachments for slicing/grating, speeds up meal prep.
    • Cons: Often large and bulky to store, can be fiddly to clean, and some models produce quite a lot of noise.

    The Blender

    “One advantage of a blender is that it has a smaller footprint, so it can sit neatly in one area of the kitchen worktop,” notes Steven. “Blenders are also quick and easy to clean, with the jug often being dishwasher safe.”

    • Pros: Quick and easy to use, perfect for silky smooth liquids, compact footprint, great for crushing ice.
    • Cons: Blades are not as sharp (making them less effective for thick/dry ingredients), and the design can lead to blockages if there isn’t enough liquid in the jug.

    How Much Should You Spend?

    • Blenders: Prices start around £29.99 for personal, on-the-go bullet models and can increase to £600 for robust, professional-grade jug styles.
    • Food Processors: Budget solutions start around £74.99, with prices ranging up to £800+ for expert models featuring a massive host of attachments and large capacities.

    Generally, blenders are more affordable. However, if your main goal is cutting down on daily food preparation and chopping time, a food processor is a highly justifiable purchase.

    Which One is Best For You?

    The right choice comes down entirely to your cooking habits:

    • Choose a Blender if: You frequently prepare your own sauces, purees, and smoothies. If you love healthy beverages on the go or need to crush ice, a blender is the perfect addition to your kitchen. Expert Pick: Salter NutriPro for compact power, or the Salter PowerPro for large batch blending.
    • Choose a Food Processor if: You want to conquer diverse cooking tasks like chopping, slicing, shredding, and baking. It is the undisputed champion for home bakers, busy families, and budding kitchen connoisseurs. Expert Pick: The Magimix 4200XL (for average families) or 5200XL (for large crowds).
  • French Press vs. Coffee Maker: Which Is the Right Choice for Me?

    French Press vs. Coffee Maker: Which Is the Right Choice for Me?

    When it comes to brewing the perfect cup of coffee, there is no one-size-fits-all solution; it all comes down to your personal taste and your daily lifestyle.

    If you have a chaotic morning routine and need your caffeine fix seamlessly with minimal effort, an automatic coffee maker will be a lifesaver. However, if you prefer a slower pace, want to hone your barista skills, and crave a bolder flavor profile, the traditional French press (or cafetière) might be exactly what you need.

    Here is a comprehensive breakdown of the cost, convenience, and flavor of both brewing methods to help you find the perfect match for your kitchen.

    The French Press: For the Coffee Purist

    A French press creates coffee by steeping coarse coffee grounds in nearly boiling water, followed by pressing a metal mesh filter down to separate the grounds from the liquid.

    The Pros:

    • Richer Flavor: Because it doesn’t use a paper filter, a French press allows the coffee’s natural oils to remain in your cup, resulting in a robust, full-bodied flavor.
    • Highly Customizable: You have complete control over the steeping time and the coffee-to-water ratio.
    • Eco-Friendly & Affordable: There is zero waste (no plastic pods or paper filters), and high-quality glass or stainless steel presses can easily be found for under £30.
    • Batch Brewing: A standard French press makes around four cups at once, perfect for entertaining or fueling up for a long morning.
    • Space-Saving: It is compact and easily stored in a kitchen cupboard.

    The Cons:

    • More Effort: It requires boiling water separately, timing the steep, and manually plunging.
    • Sediment: The metal mesh filter allows some micro-grounds (sediment) to slip through, which some coffee drinkers find gritty.
    • Cleanup: Scooping out wet grounds and washing the plunger is more tedious than tossing a pod.

    The Coffee Maker: For the Busy Bee

    Whether you choose a convenient pod-based model (like Nespresso) or a fully automatic espresso machine, these appliances use high-pressure steam and hot water to brew your drink at the touch of a button.

    The Pros:

    • Ultimate Convenience: Insert a pod or press a button, and you have coffee in under a minute. Perfect for fast-paced mornings.
    • Consistency: Automatic machines deliver the exact same shot of coffee time after time.
    • Drink Variety: Many machines can create espressos, cappuccinos, lattes, and flat whites with built-in milk frothers.
    • Easy Cleanup: Pod machines require almost zero daily cleanup, while automatic bean-to-cup machines often have self-cleaning cycles.

    The Cons:

    • Higher Price Tag: Quality coffee machines require a significant upfront investment (often ranging from £100 to over £300+).
    • Ongoing Costs & Waste: Buying proprietary coffee pods is expensive and creates a substantial amount of environmental waste compared to buying bags of coffee beans.
    • Counter Space: Espresso machines are bulky and require dedicated countertop real estate.

    Head-to-Head Comparison

    FeatureFrench PressCoffee Maker (Pod/Auto)
    Brew Time4–5 MinutesUnder 1 Minute
    Flavor ProfileBold, heavy, full-bodiedClean, consistent, varied
    Upfront CostLow (Under £50)High (£100 – £300+)
    Eco-FriendlyYes (Zero waste)No (Pod waste)
    Kitchen SpaceMinimalRequires dedicated counter space

    Expert Tips for the Perfect Brew

    Whichever method you choose, technique matters. Here is how the pros get the most out of their morning brew:

    Mastering the French Press

    • The Golden Ratio: David Cutler, Head of Training at Lavazza, recommends a 1:16 coffee-to-water ratio (about 15 grams of medium-to-coarse ground coffee per 250ml of water).
    • Watch the Temperature: “The biggest tip is to not fully boil the kettle, as you will scorch the flavour out of your coffee,” warns Ben Fishlock from SOroast. Aim for about 91°C—just as the kettle starts making a bit of noise—and brew for exactly four minutes.

    Mastering the Coffee Machine

    • Dial in the Grind: If you are using a manual or semi-automatic espresso machine, precision is key. Espresso should brew in about 20–30 seconds. If your coffee pours out too fast, your grind is too coarse; if it drips out too slowly, your grind is too fine.

    The Final Verdict

    If you are a minimalist who prefers simplicity, wants to save money, and enjoys the relaxing ritual of brewing a bold cup of coffee, the French press is your best bet.

    However, if you live a fast-paced life, want a wide variety of café-style drinks (like lattes and cappuccinos), and prioritize speed and convenience above all else, investing in an automatic coffee maker will be the perfect addition to your kitchen.

  • How to Sharpen Kitchen Knives Like a Pro

    How to Sharpen Kitchen Knives Like a Pro

    No matter what kind of meal you are preparing, chances are it involves using a knife to slice, chop, or dice ingredients. Considering we use them on a daily basis, it is vital to maintain your knives. Keeping them sharp and honed not only allows you to cut cleanly and with precision, but it actually keeps you safer!

    Contrary to popular belief, a sharp knife is much less likely to cause a cutting mishap than a dull blade, which is prone to slipping and juddering.

    Chef Ruth Hansom from Hansom Restaurant offers a great test: “Cutting a tomato is always a good indication. If you’re unable to cut through the skin without squashing the tomato, you have a blunt blade.”

    After you have invested in a quality kitchen knife set, it is time to choose a sharpening tool to keep them in perfect condition. Here is our cutting-edge guide to the best sharpening tools and techniques.

    1. Whetstones (Manual Sharpening)

    Whetstones are the most traditional and precise way to keep blades sharp. These flat, rectangular blocks are used to sharpen a knife by rubbing the blade’s surface against the block to physically grind away microscopic amounts of metal, creating a brand new edge.

    Understanding Grit Size:

    • Coarse (400 grit): For repairing chips and incredibly dull knives.
    • Medium (1000 grit): The standard choice for regular sharpening.
    • Fine (4000–8000 grit): Used solely for polishing the edge to a mirror finish.

    How to Use a Whetstone:

    1. Submerge the stone in water for 10 minutes.
    2. Place it on a slip-resistant surface, coarse side up.
    3. Hold the knife at a 14-degree angle (or the angle recommended by the manufacturer).
    4. Slowly slide the blade across the stone from the tip to the heel.
    5. Repeat on the other side, then flip the stone to the fine side to polish.
    • Pros: Highly precise, cost-effective, space-saving.
    • Cons: Requires practice and patience to master the angle.

    2. Sharpening Rods (Honers)

    Professional chefs swear by using a honing rod daily. A honing rod does not actually sharpen a knife. Instead, it realigns the microscopic edge of the blade, which gets bent out of shape every time it hits your chopping board.

    How to Hone: Hold the rod firmly and place the blade against it at roughly a 20-degree angle. Draw the blade down and towards you smoothly, alternating sides. Doing this before every cooking session will significantly delay your need for an actual whetstone sharpening!

    • Pros: Protects the blade, budget-friendly, highly effective for daily maintenance.
    • Cons: Cannot fix a truly dull or chipped knife.

    3. Electric Knife Sharpeners

    If you are not confident holding an exact 14-degree angle on a whetstone, an electric sharpener is your best friend. These machines feature internal motorized abrasive wheels or belts. You simply pull the blade slowly through the designated slots, and the machine does the precise grinding for you.

    • Pros: Incredibly easy, quick, and provides a highly consistent angle.
    • Cons: Expensive, bulky to store, and can grind away too much metal if overused, which decreases the lifespan of your knife.

    4. Pull-Through Sharpeners

    Pull-through manual sharpeners are the most popular option for casual home cooks. They feature V-shaped ceramic, stone, or diamond wheels set into a plastic handle. You simply pull the blade through the slots a few times to re-establish the edge.

    • Pros: Budget-friendly, easy to use, great for quick fixes.
    • Cons: Not suitable for brittle or thin Japanese blades, as the aggressive grinding can cause chipping.

    Expert Maintenance Tips

    Once you have your knives dangerously sharp, how do you keep them that way?

    • Never Use the Dishwasher: “The single most important thing to remember is never to put a knife in the dishwasher,” warns Laurie Timpson of Savernake Knives. The salty detergents and 80ºC heat will destroy both the steel and the handle. Always wash by hand and dry immediately.
    • Check Your Chopping Board: Never cut on hard surfaces like glass, marble, or granite. Always use a soft end-grain wood or plastic cutting board to protect the blade’s edge.
    • Store Properly: Do not throw your knives into a messy utensil drawer where they will bang against other metal tools. Store them safely in a block, on a magnetic strip, or inside protective sheaths.

    Whether you opt for the meditative precision of a whetstone or the quick convenience of an electric sharpener, regular maintenance is the key to effortless cooking!